
Roads, Ponds (with fish!), and Water Taps
There has been a lot of progress in the last two weeks. The ponds are being finished up and grassed, some of the alleys have begun to get rock put down, and all the connections into the main water line have been completed successfully. We’ll walk you through the progress with pictures.
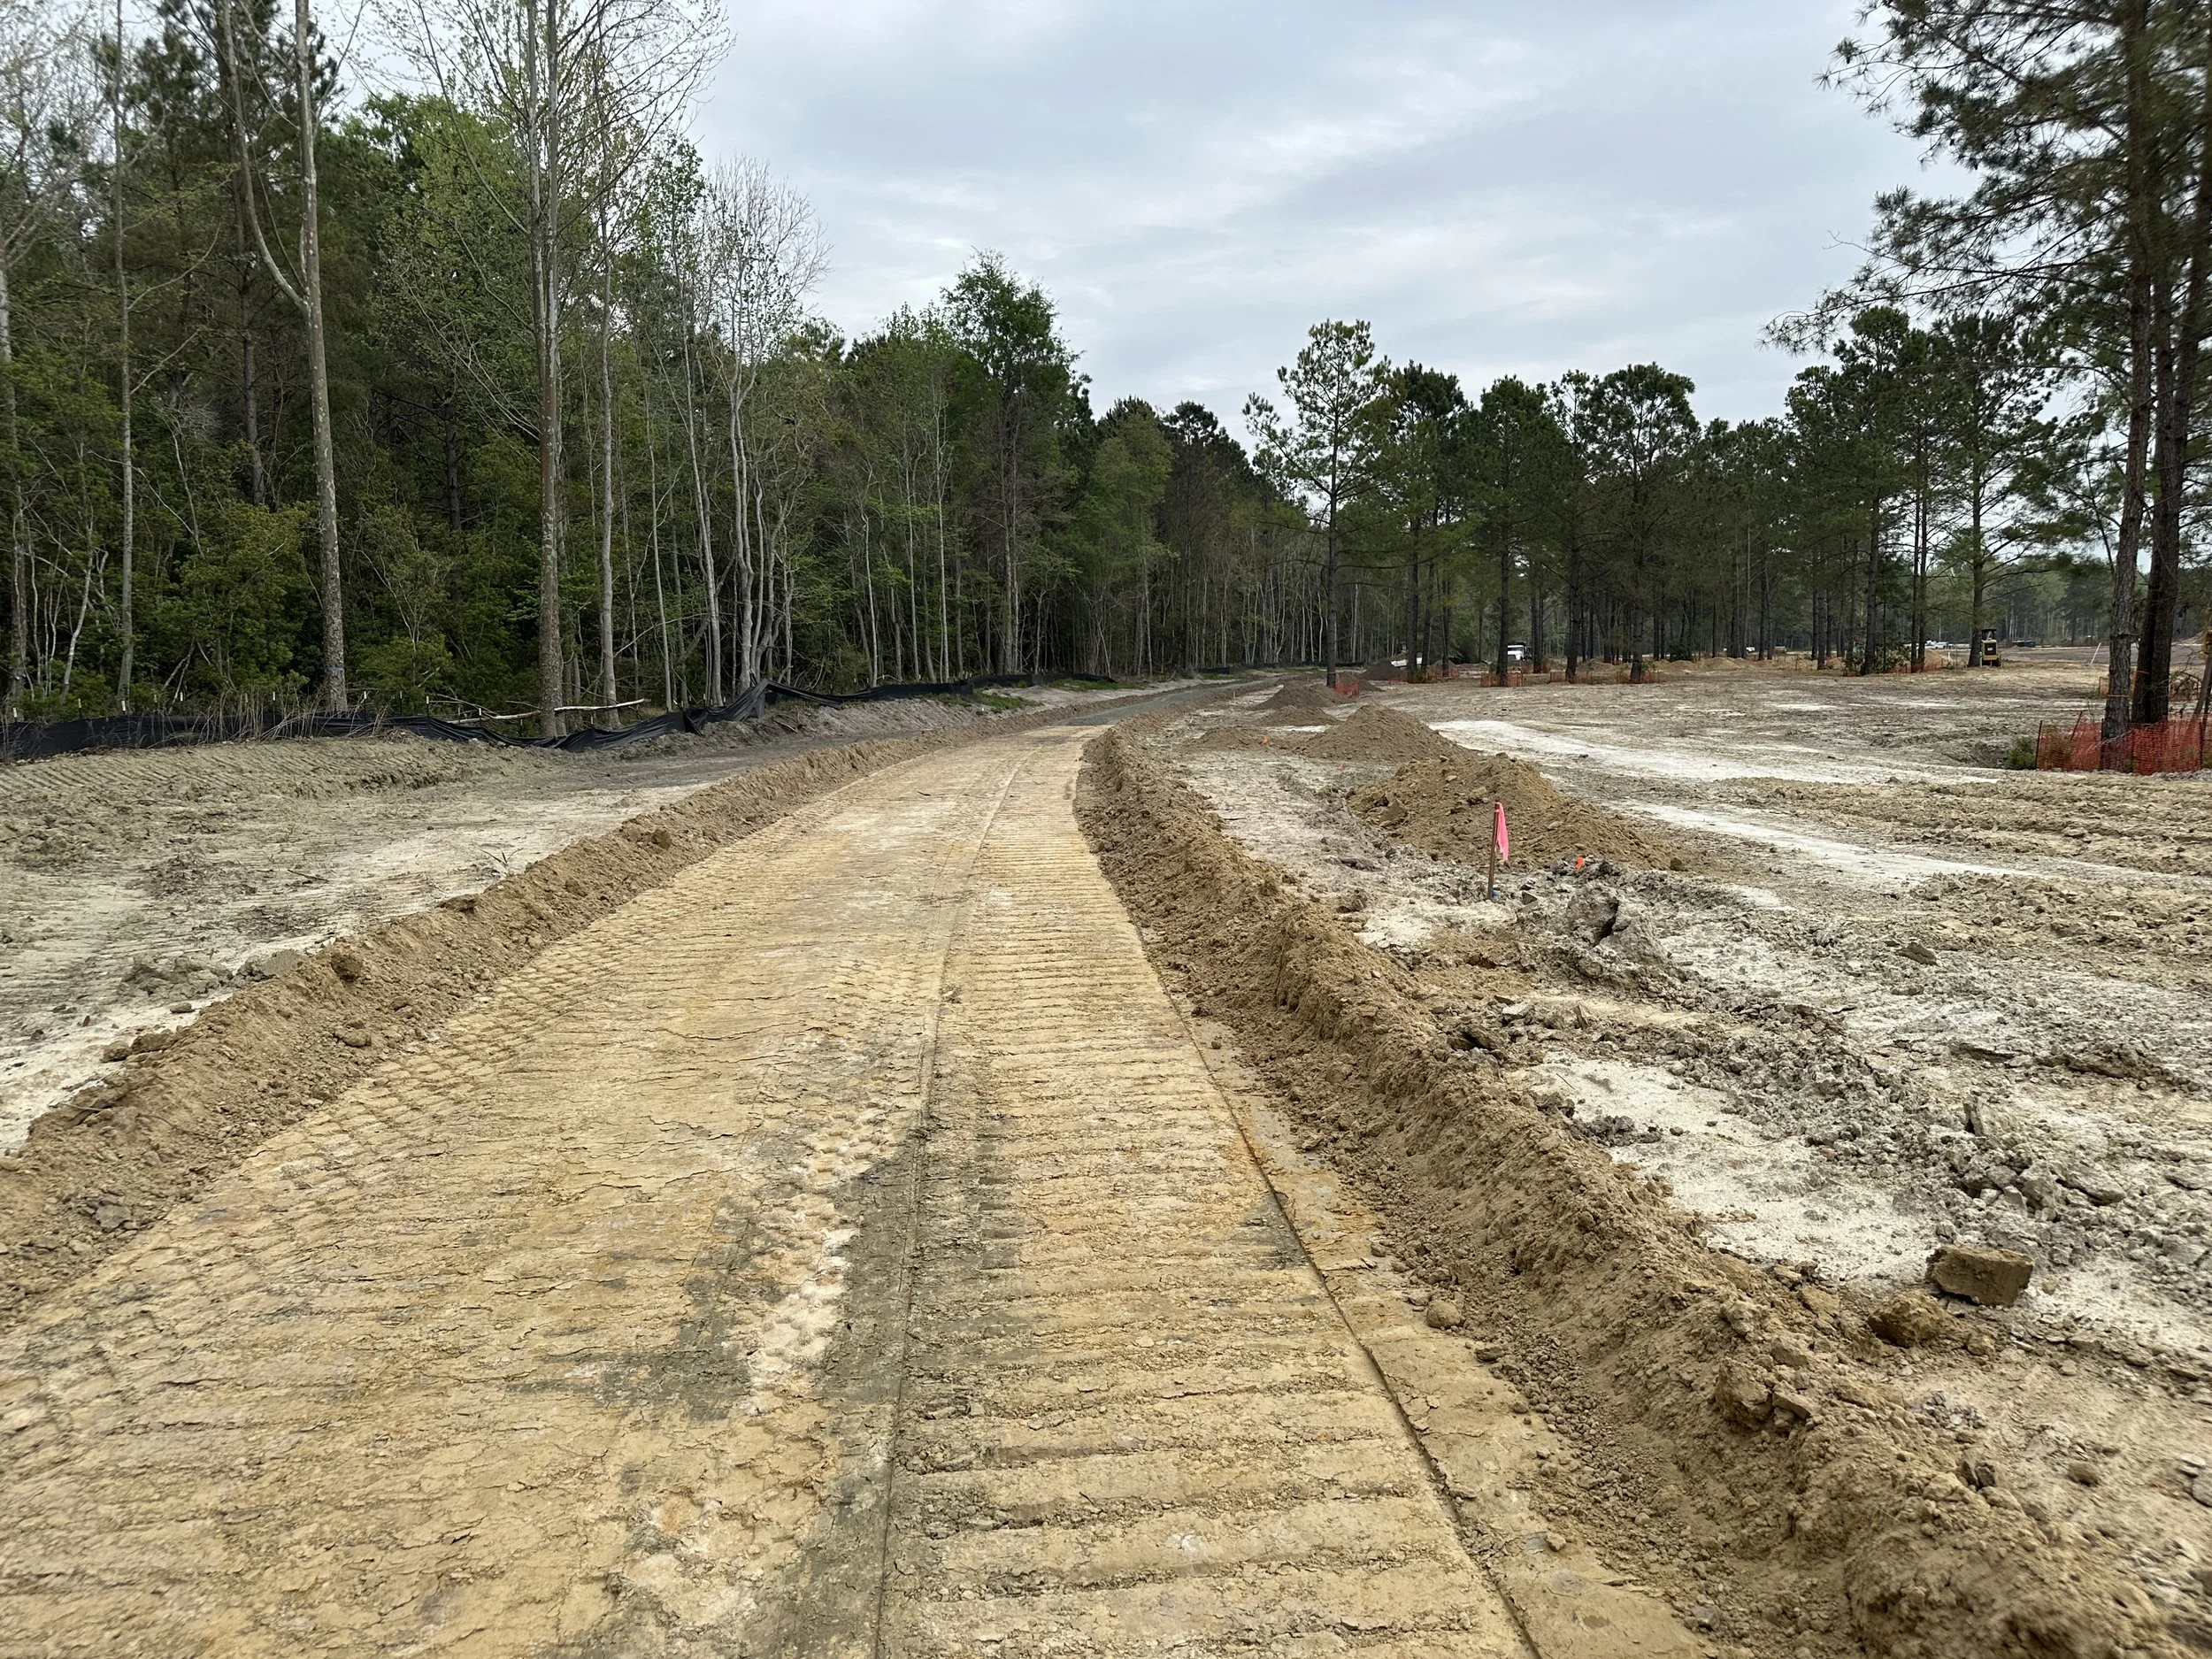
The grading crew started in the back of the property to finish out the grading of the long arcing alley back there since that is where the power company will begin their power installation. Above is a picture of the alley cut down to subgrade and prepped for the rock base and then rock being put down.
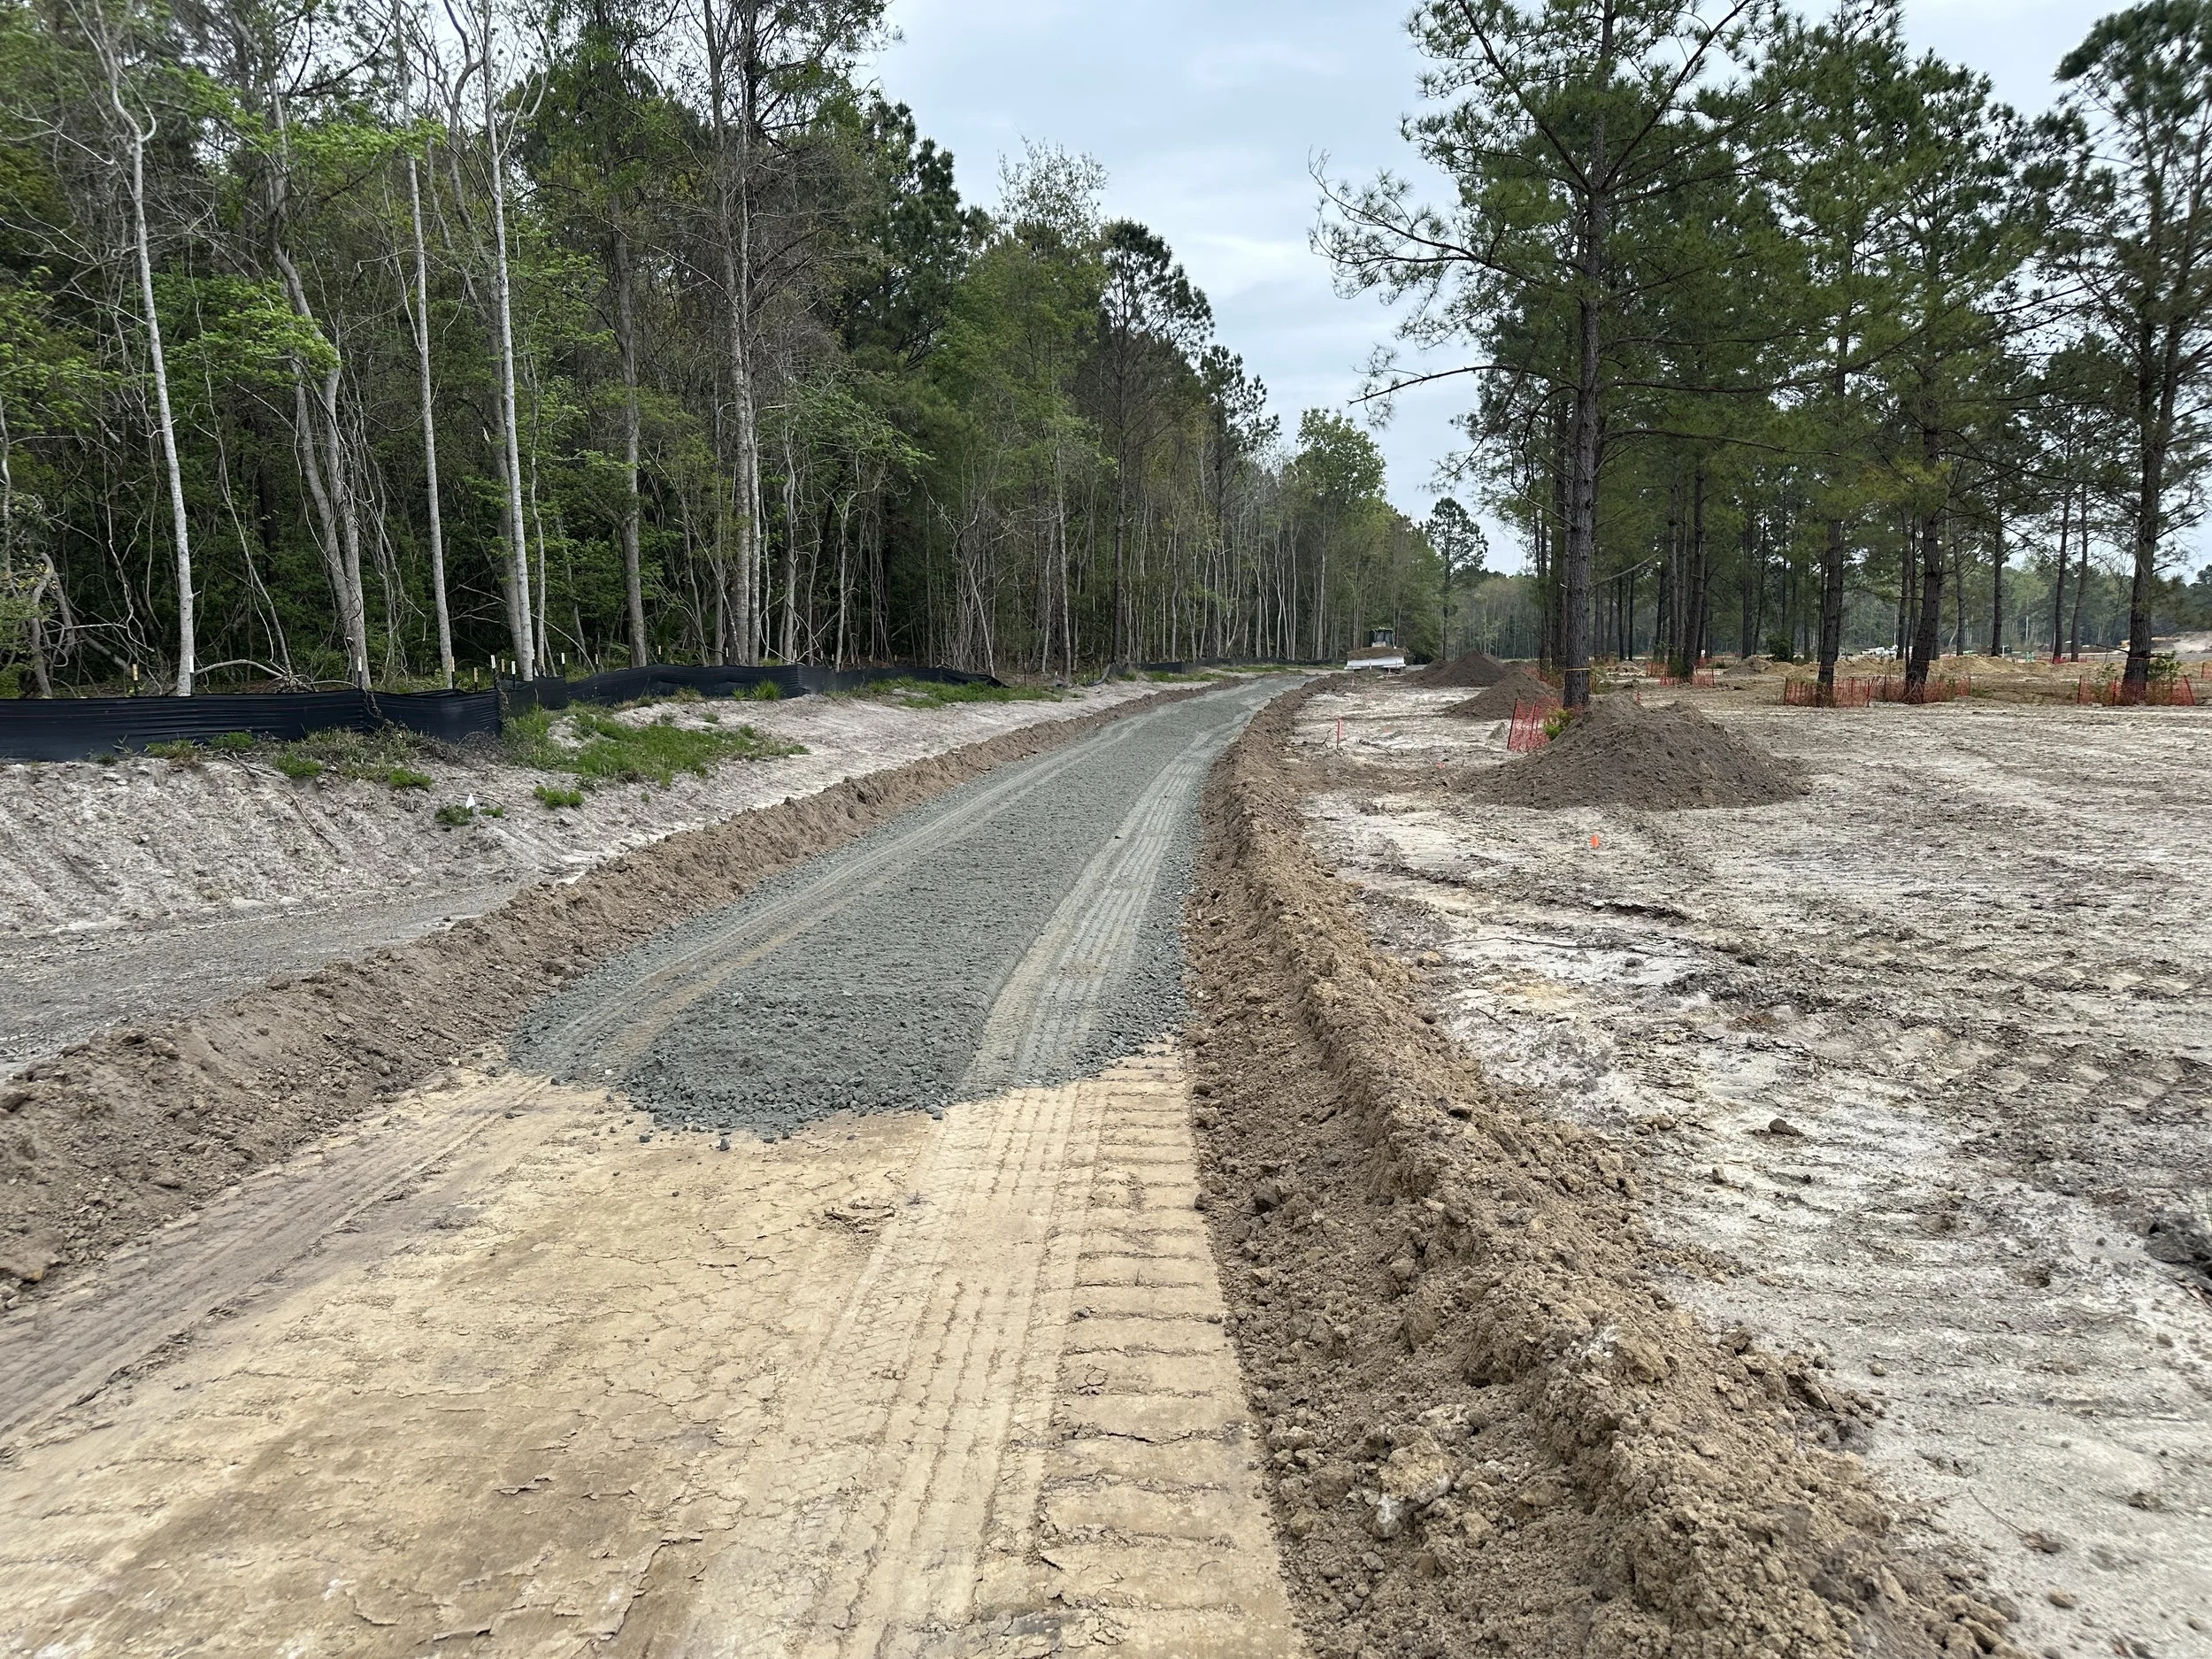
All of the alleys will get around 6” of rock. We will just be putting down the base rock for now. Since home construction should happen much more quickly in this phase, we hope to be able to hold off on putting the final top layer of the nicer rock down until the home construction is completed in order to preserve the integrity of the alleys. We’ll see.
As the grading crew finished up that alley, they then moved to finish the ponds so that all stormwater can begin to be directed into the stormwater system instead of through the temporary erosion control structures.
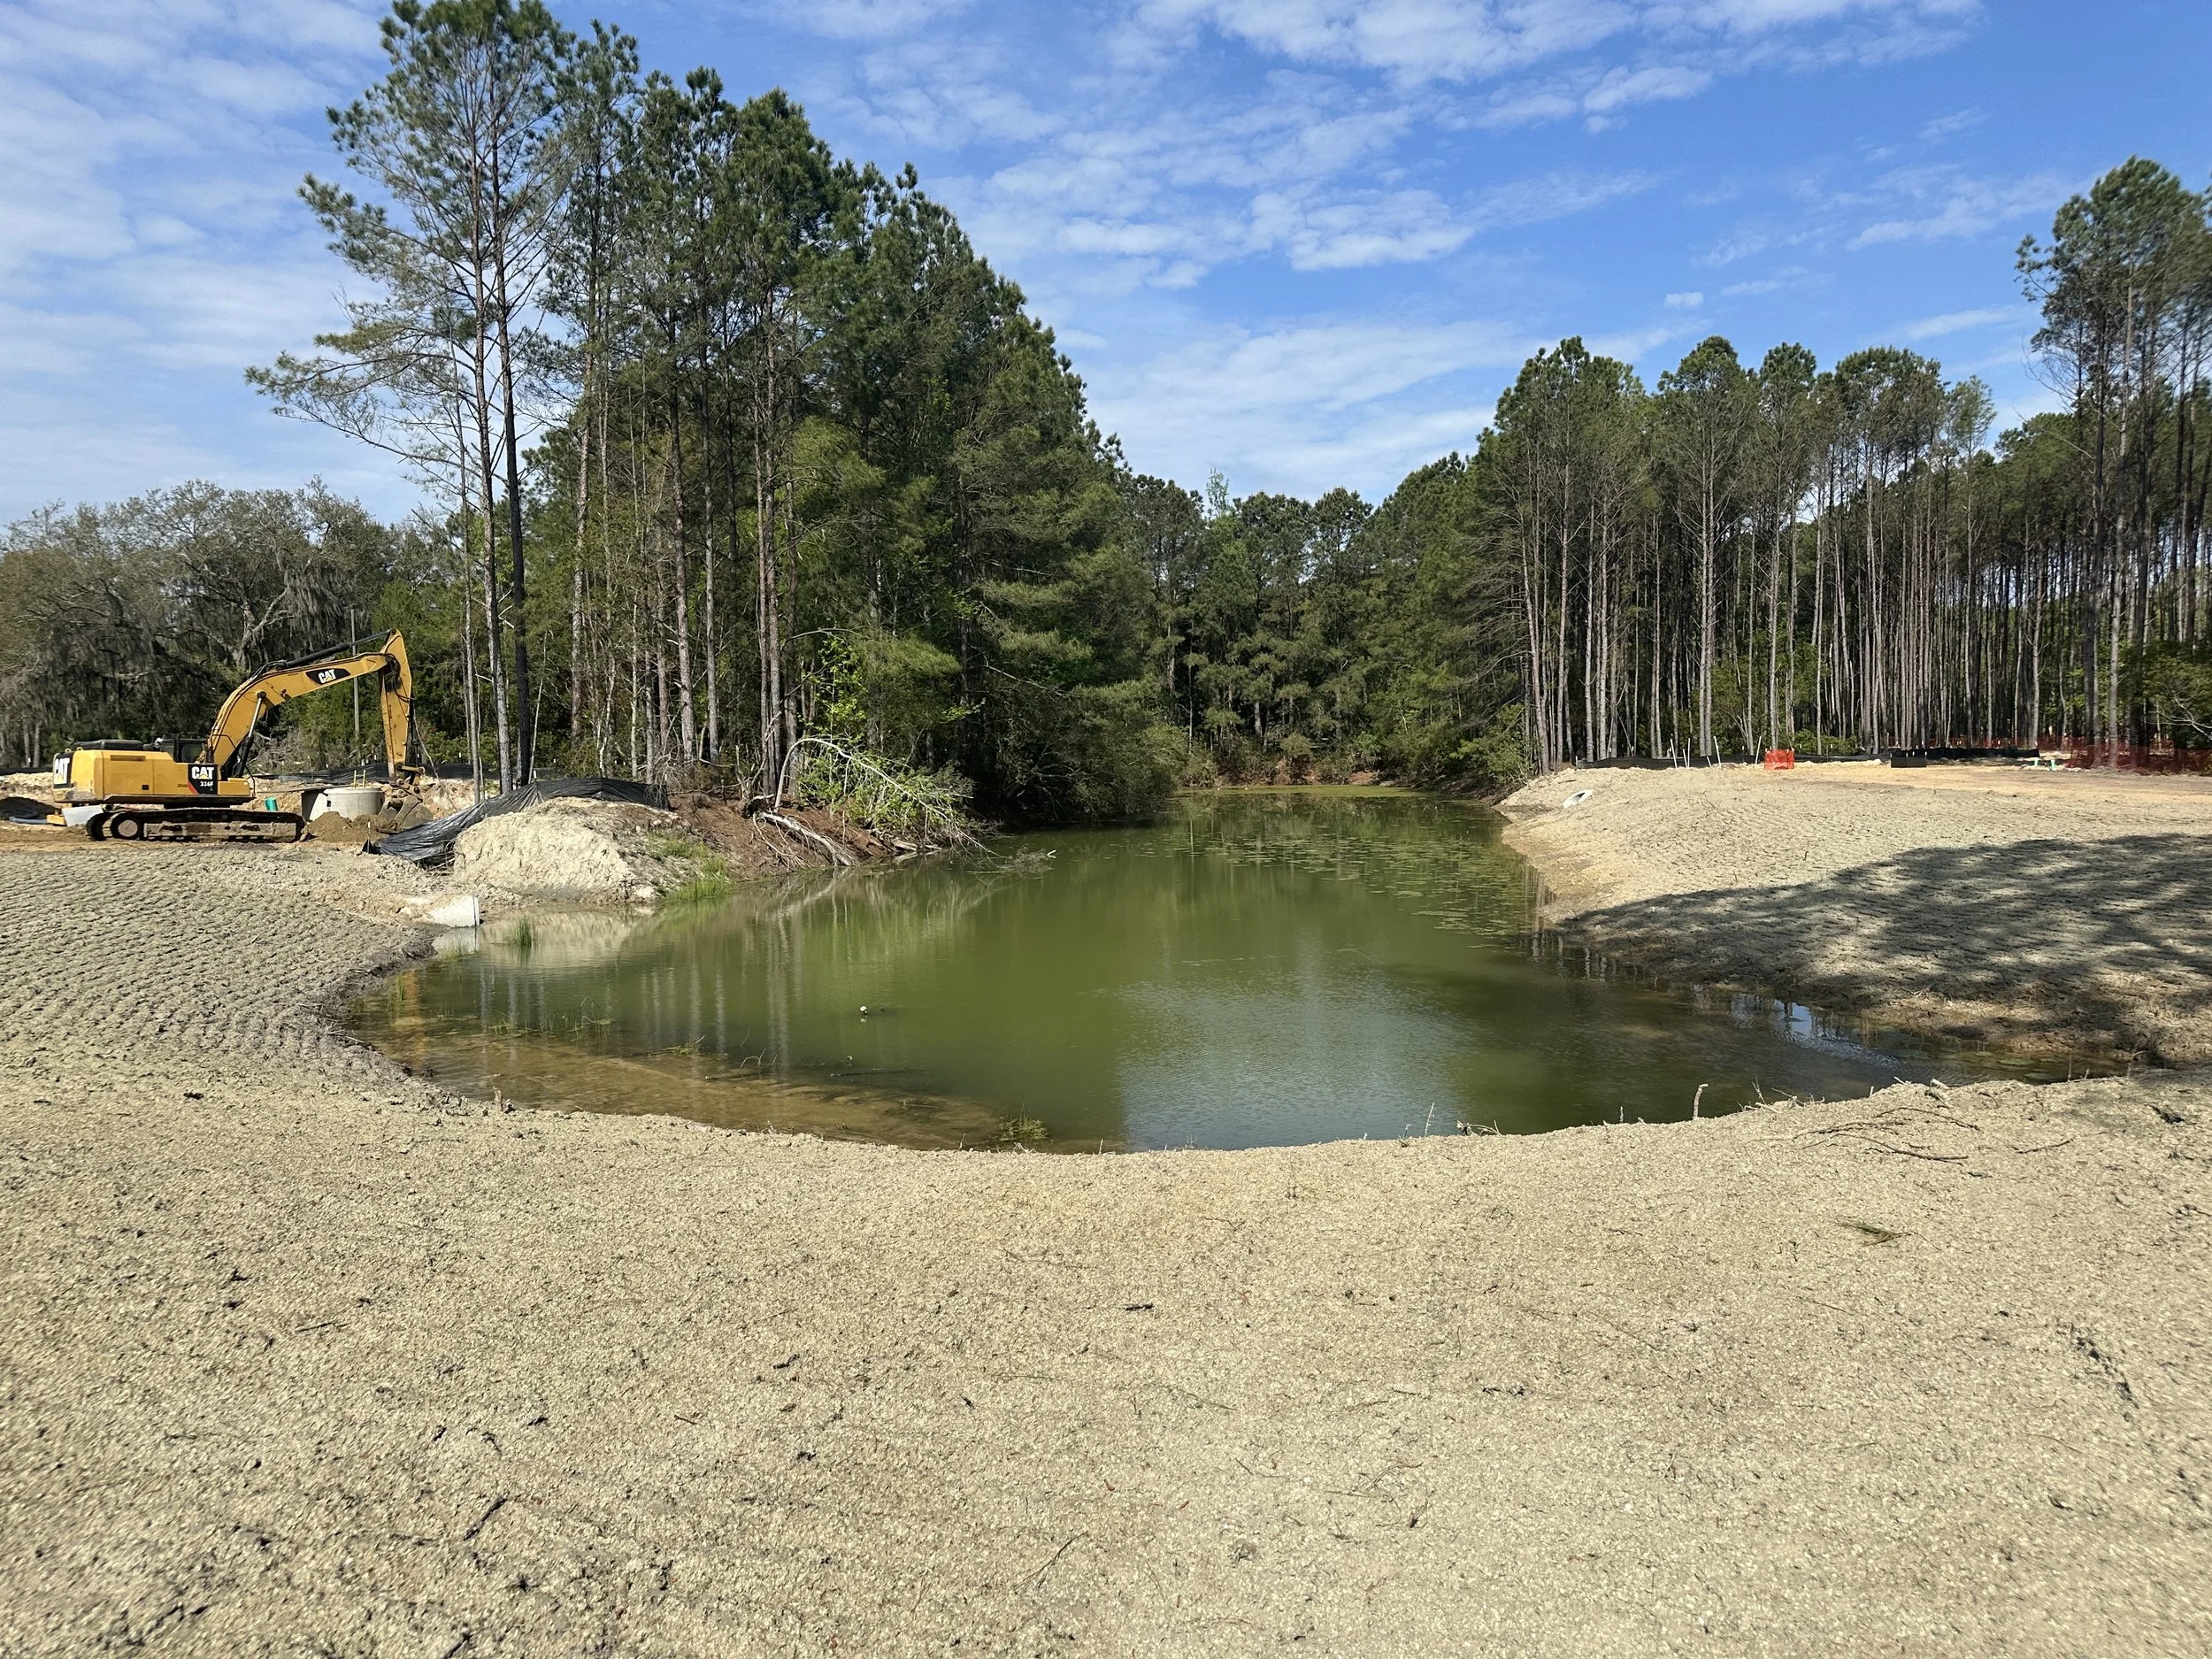
This is the pond that was existing on site. The banks are being improved and then will be hydroseeded. The water is green because it has been stagnant. Hopefully, by connecting it to the larger pond and allowing the water to start flowing, it will clear up.

This is the large pond being hydroseeded. The truck in the center of the picture has a tank on the back and a guy spraying out a mixture of grass seed and a special mulch that will lay over the seed and help it stay hydrated while it sprouts. Hopefully the rain yesterday will be just enough to start everything sprouting up. The pond will start filling up as well.
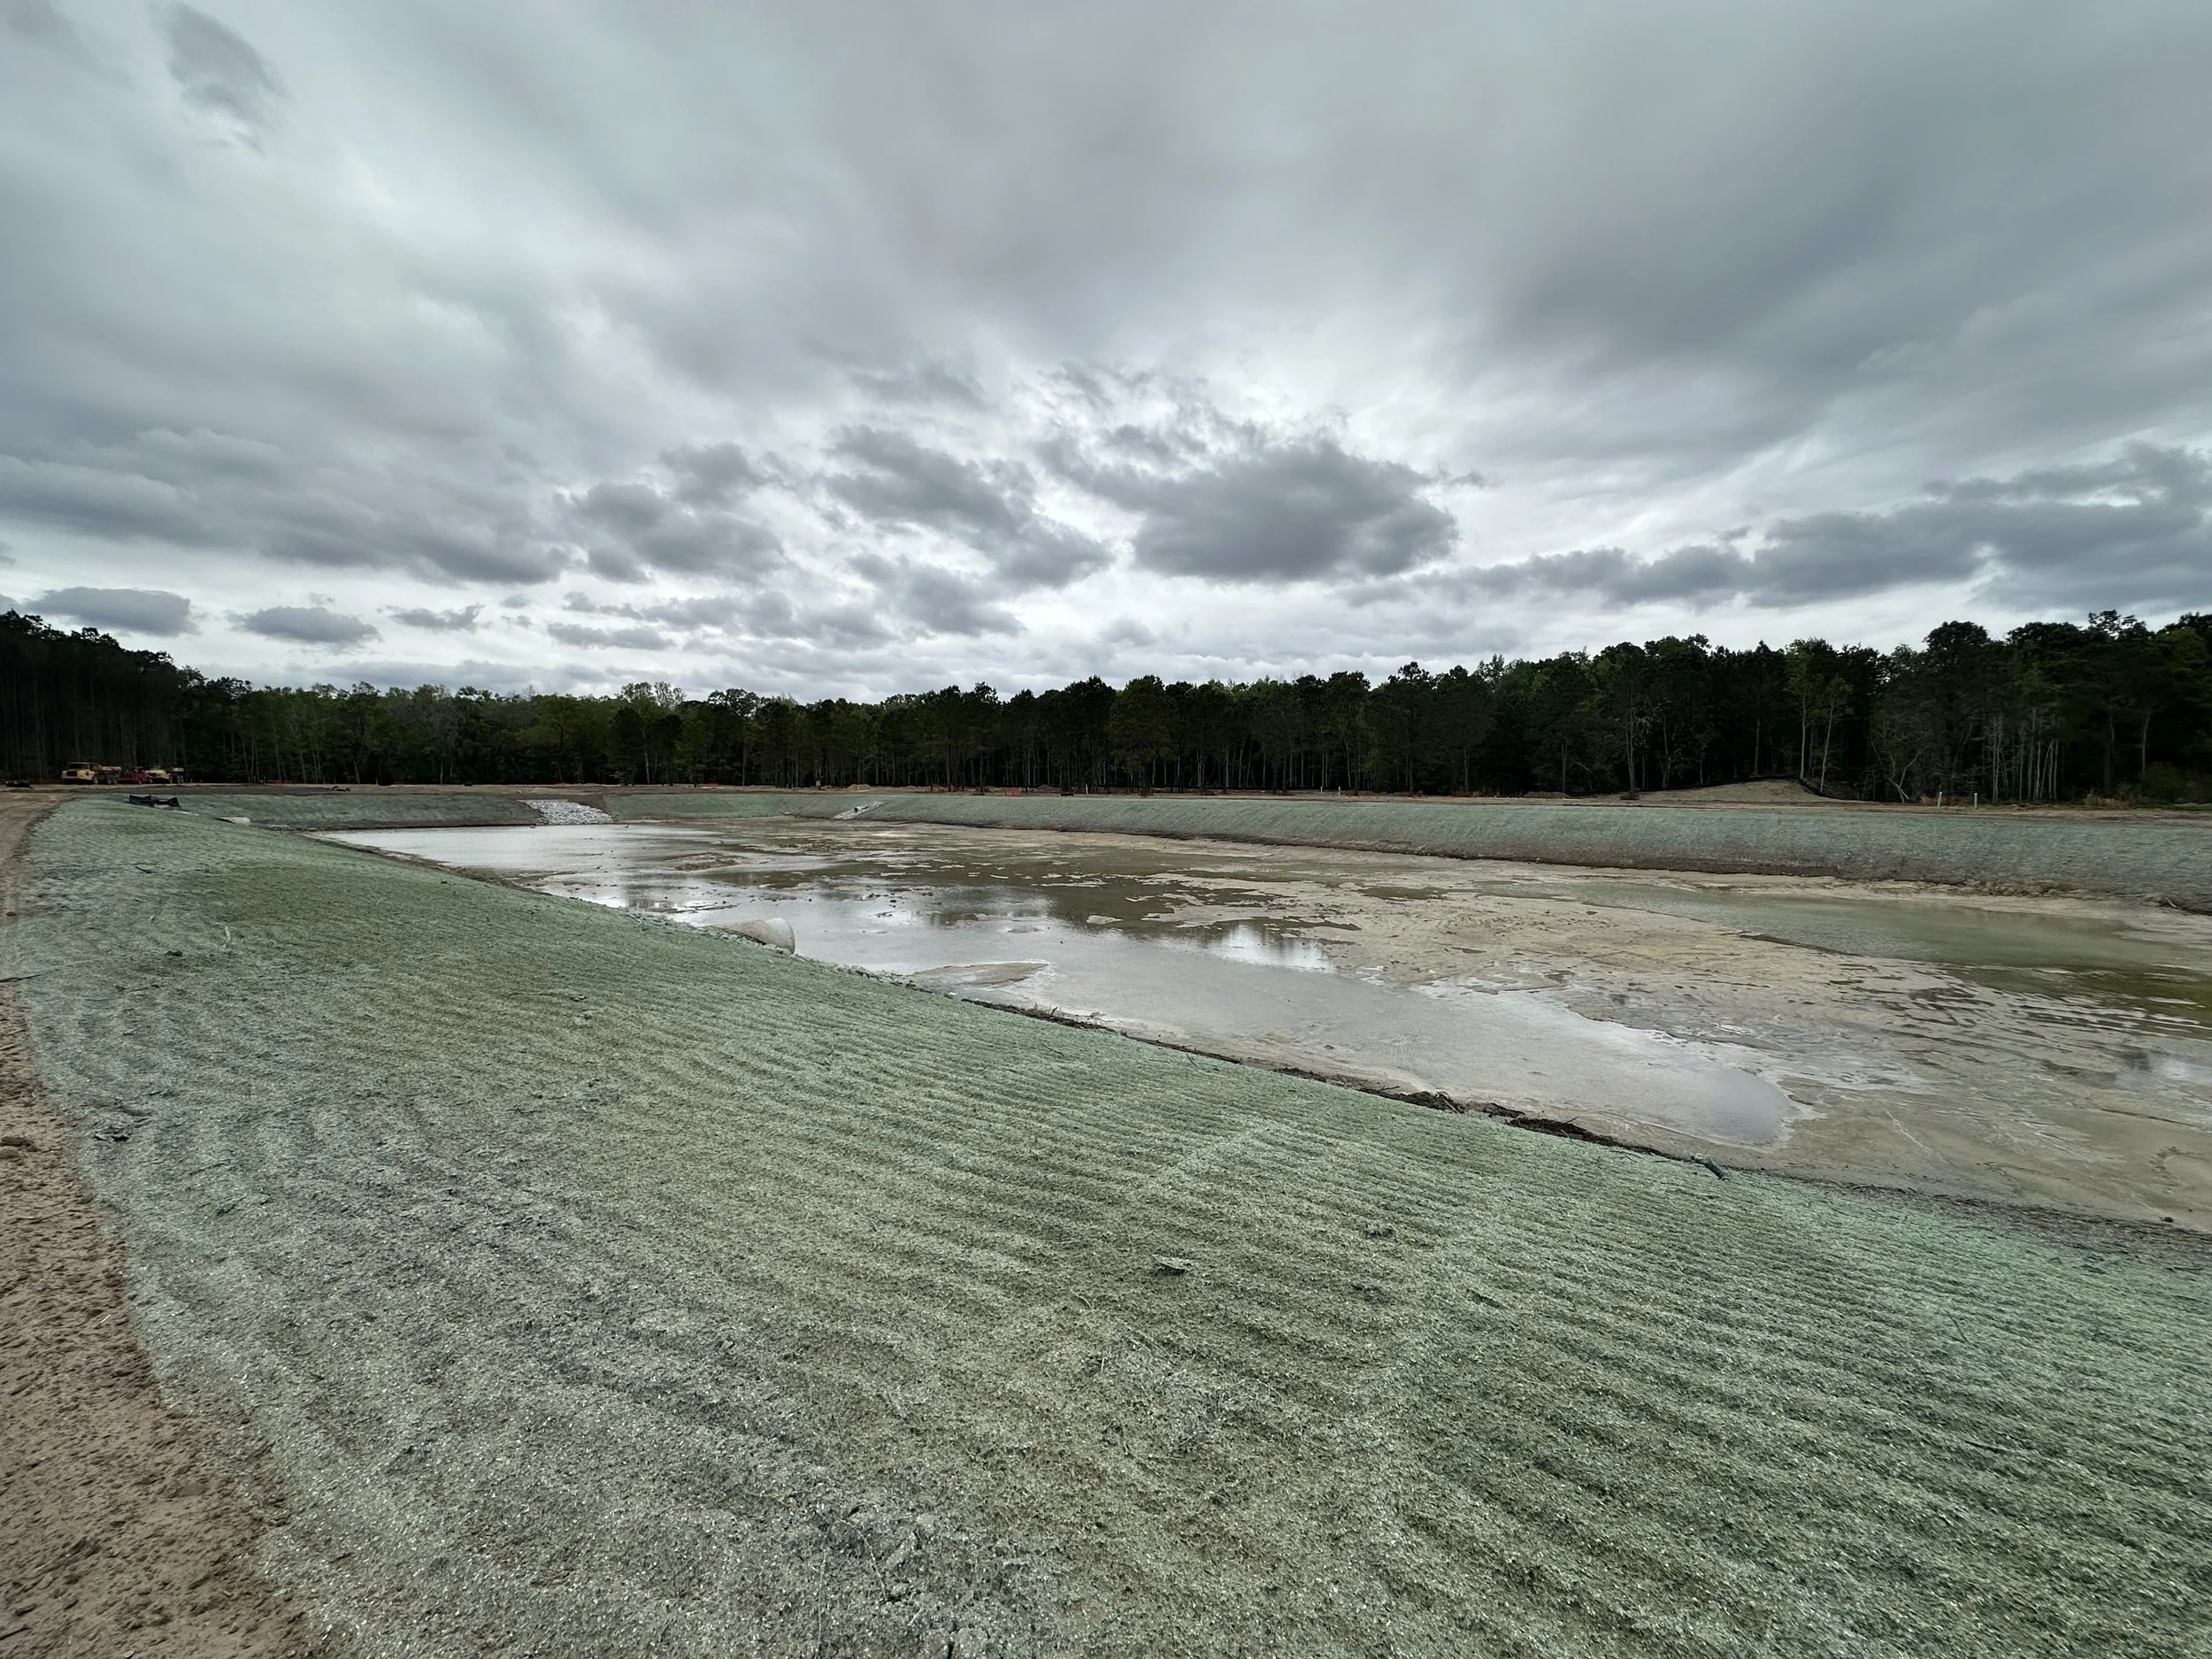
This is the large pond again with all the banks seeded.
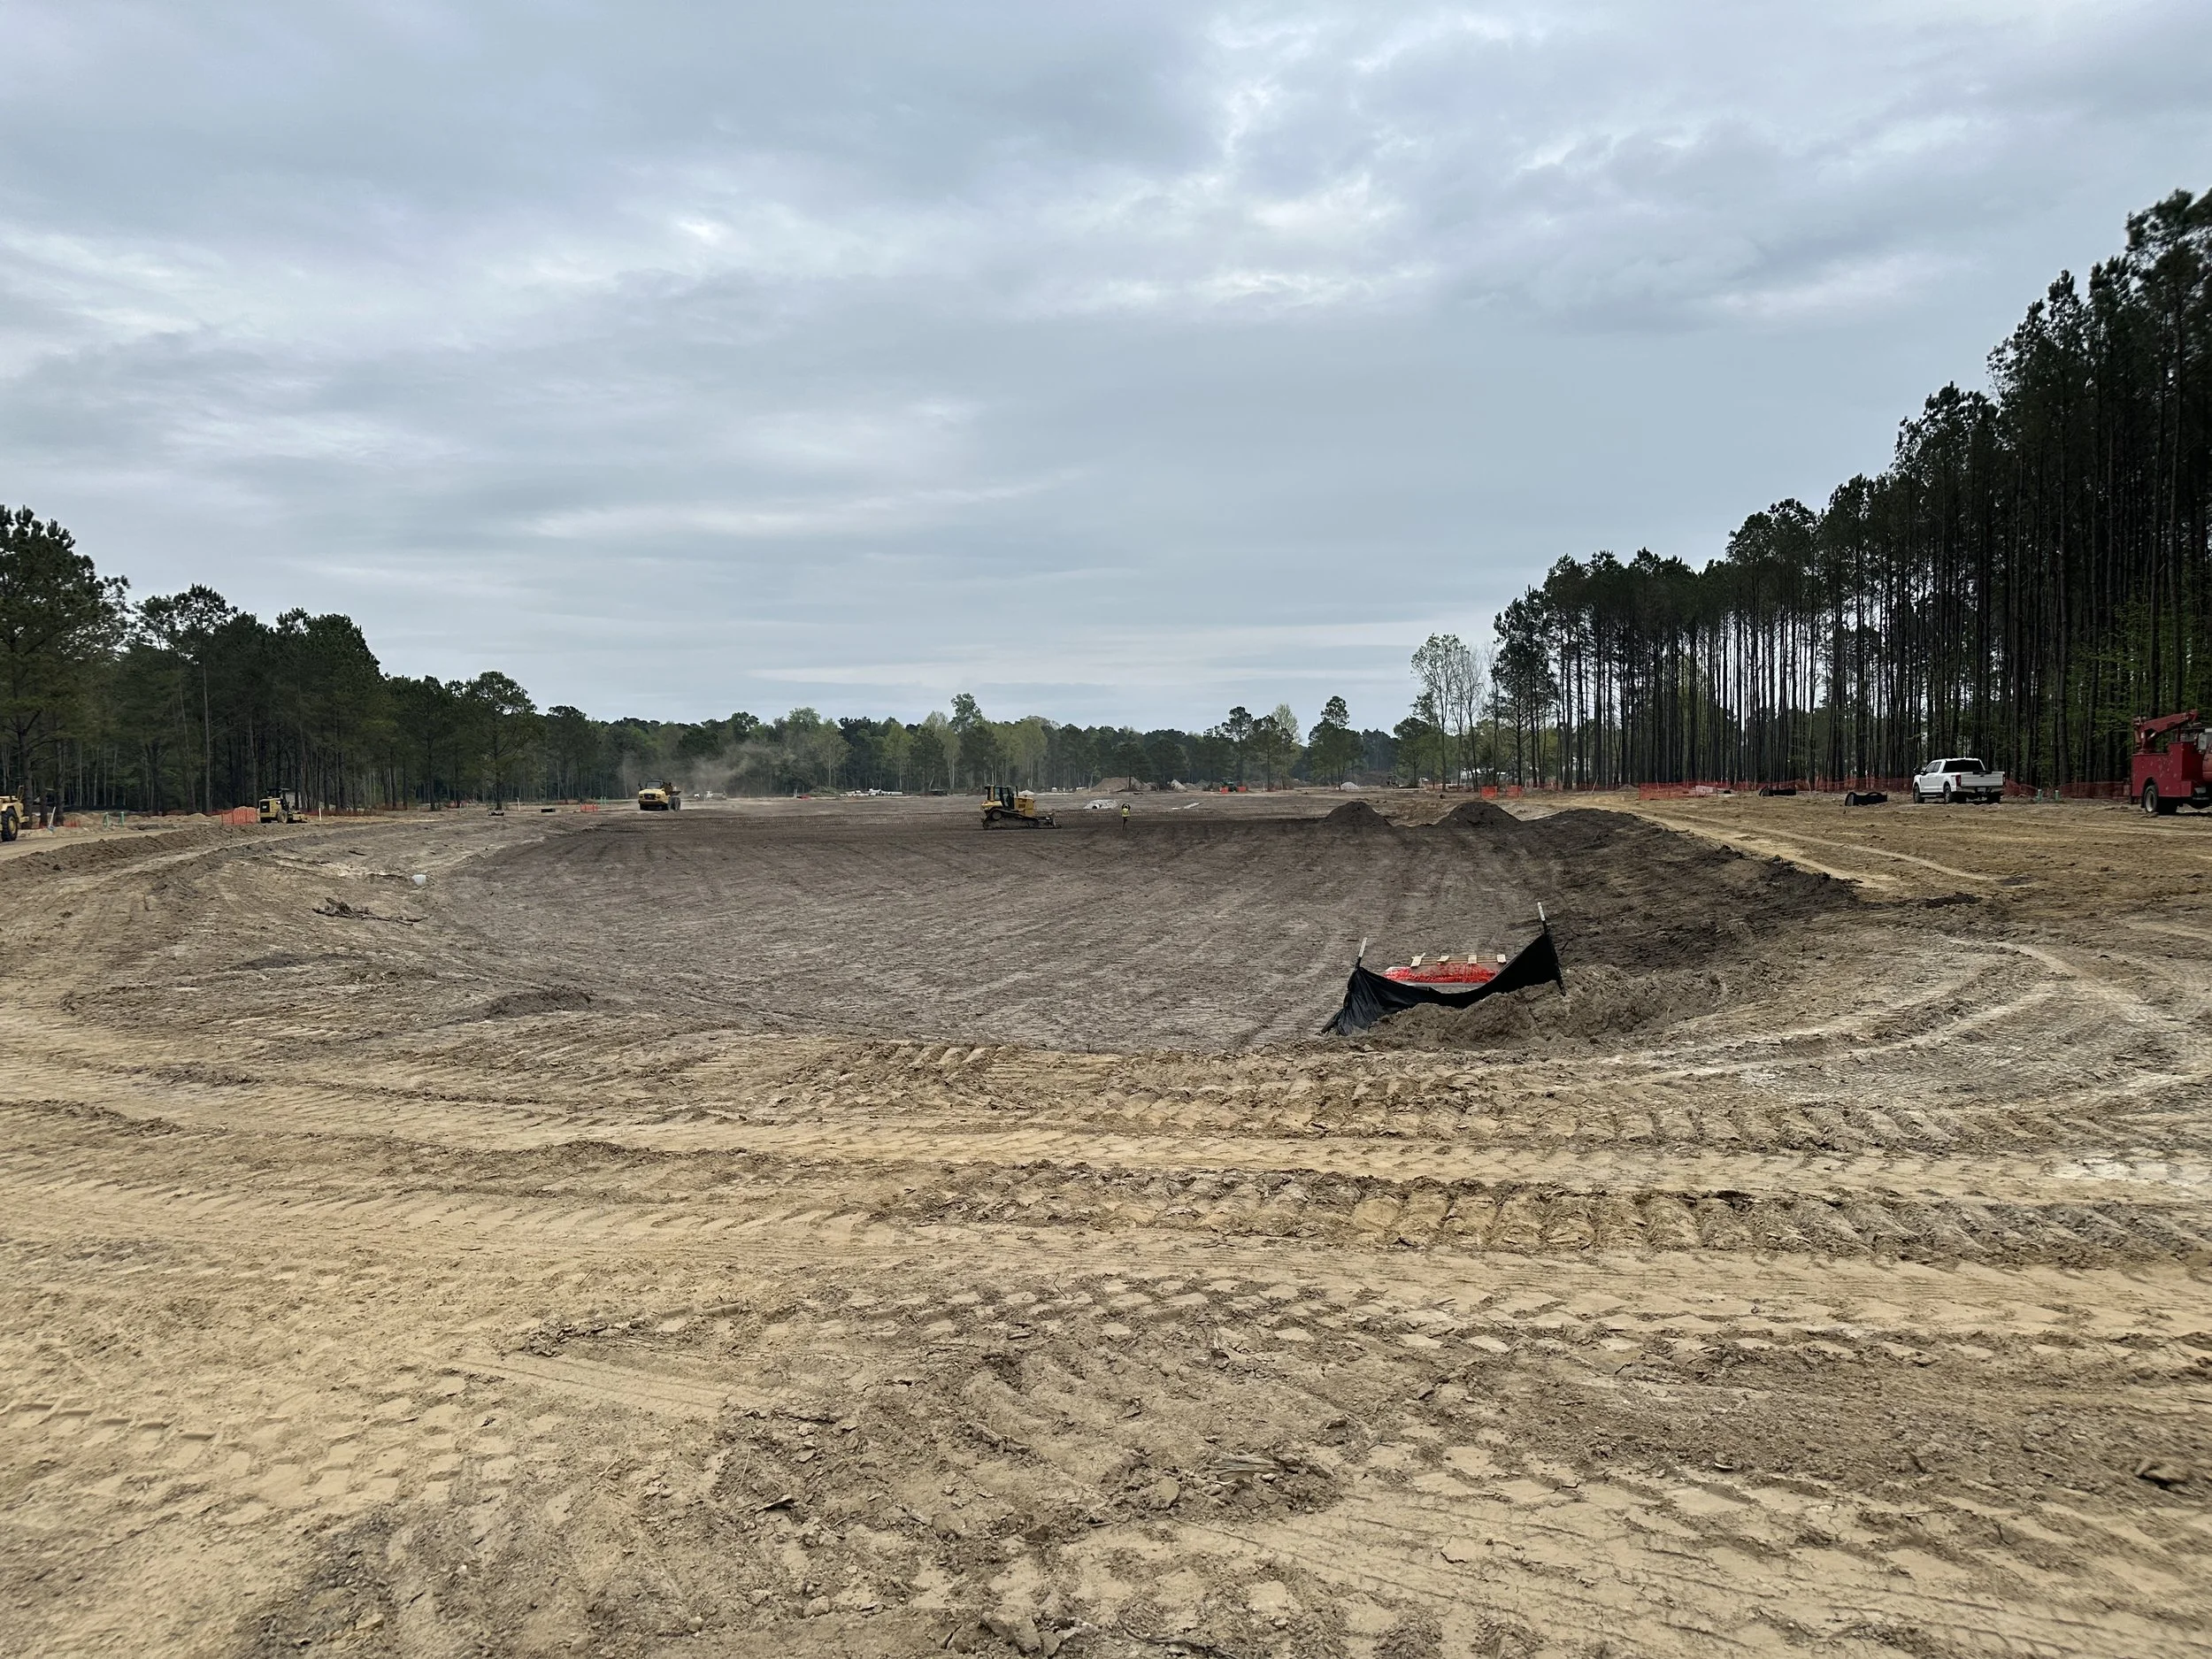
This is a picture of the dry pond having top soil added to it. This will be a slight depression, but will be grassed and will serve as a large open playfield. It will also serve as an overflow for the large wet pond during large rain events.
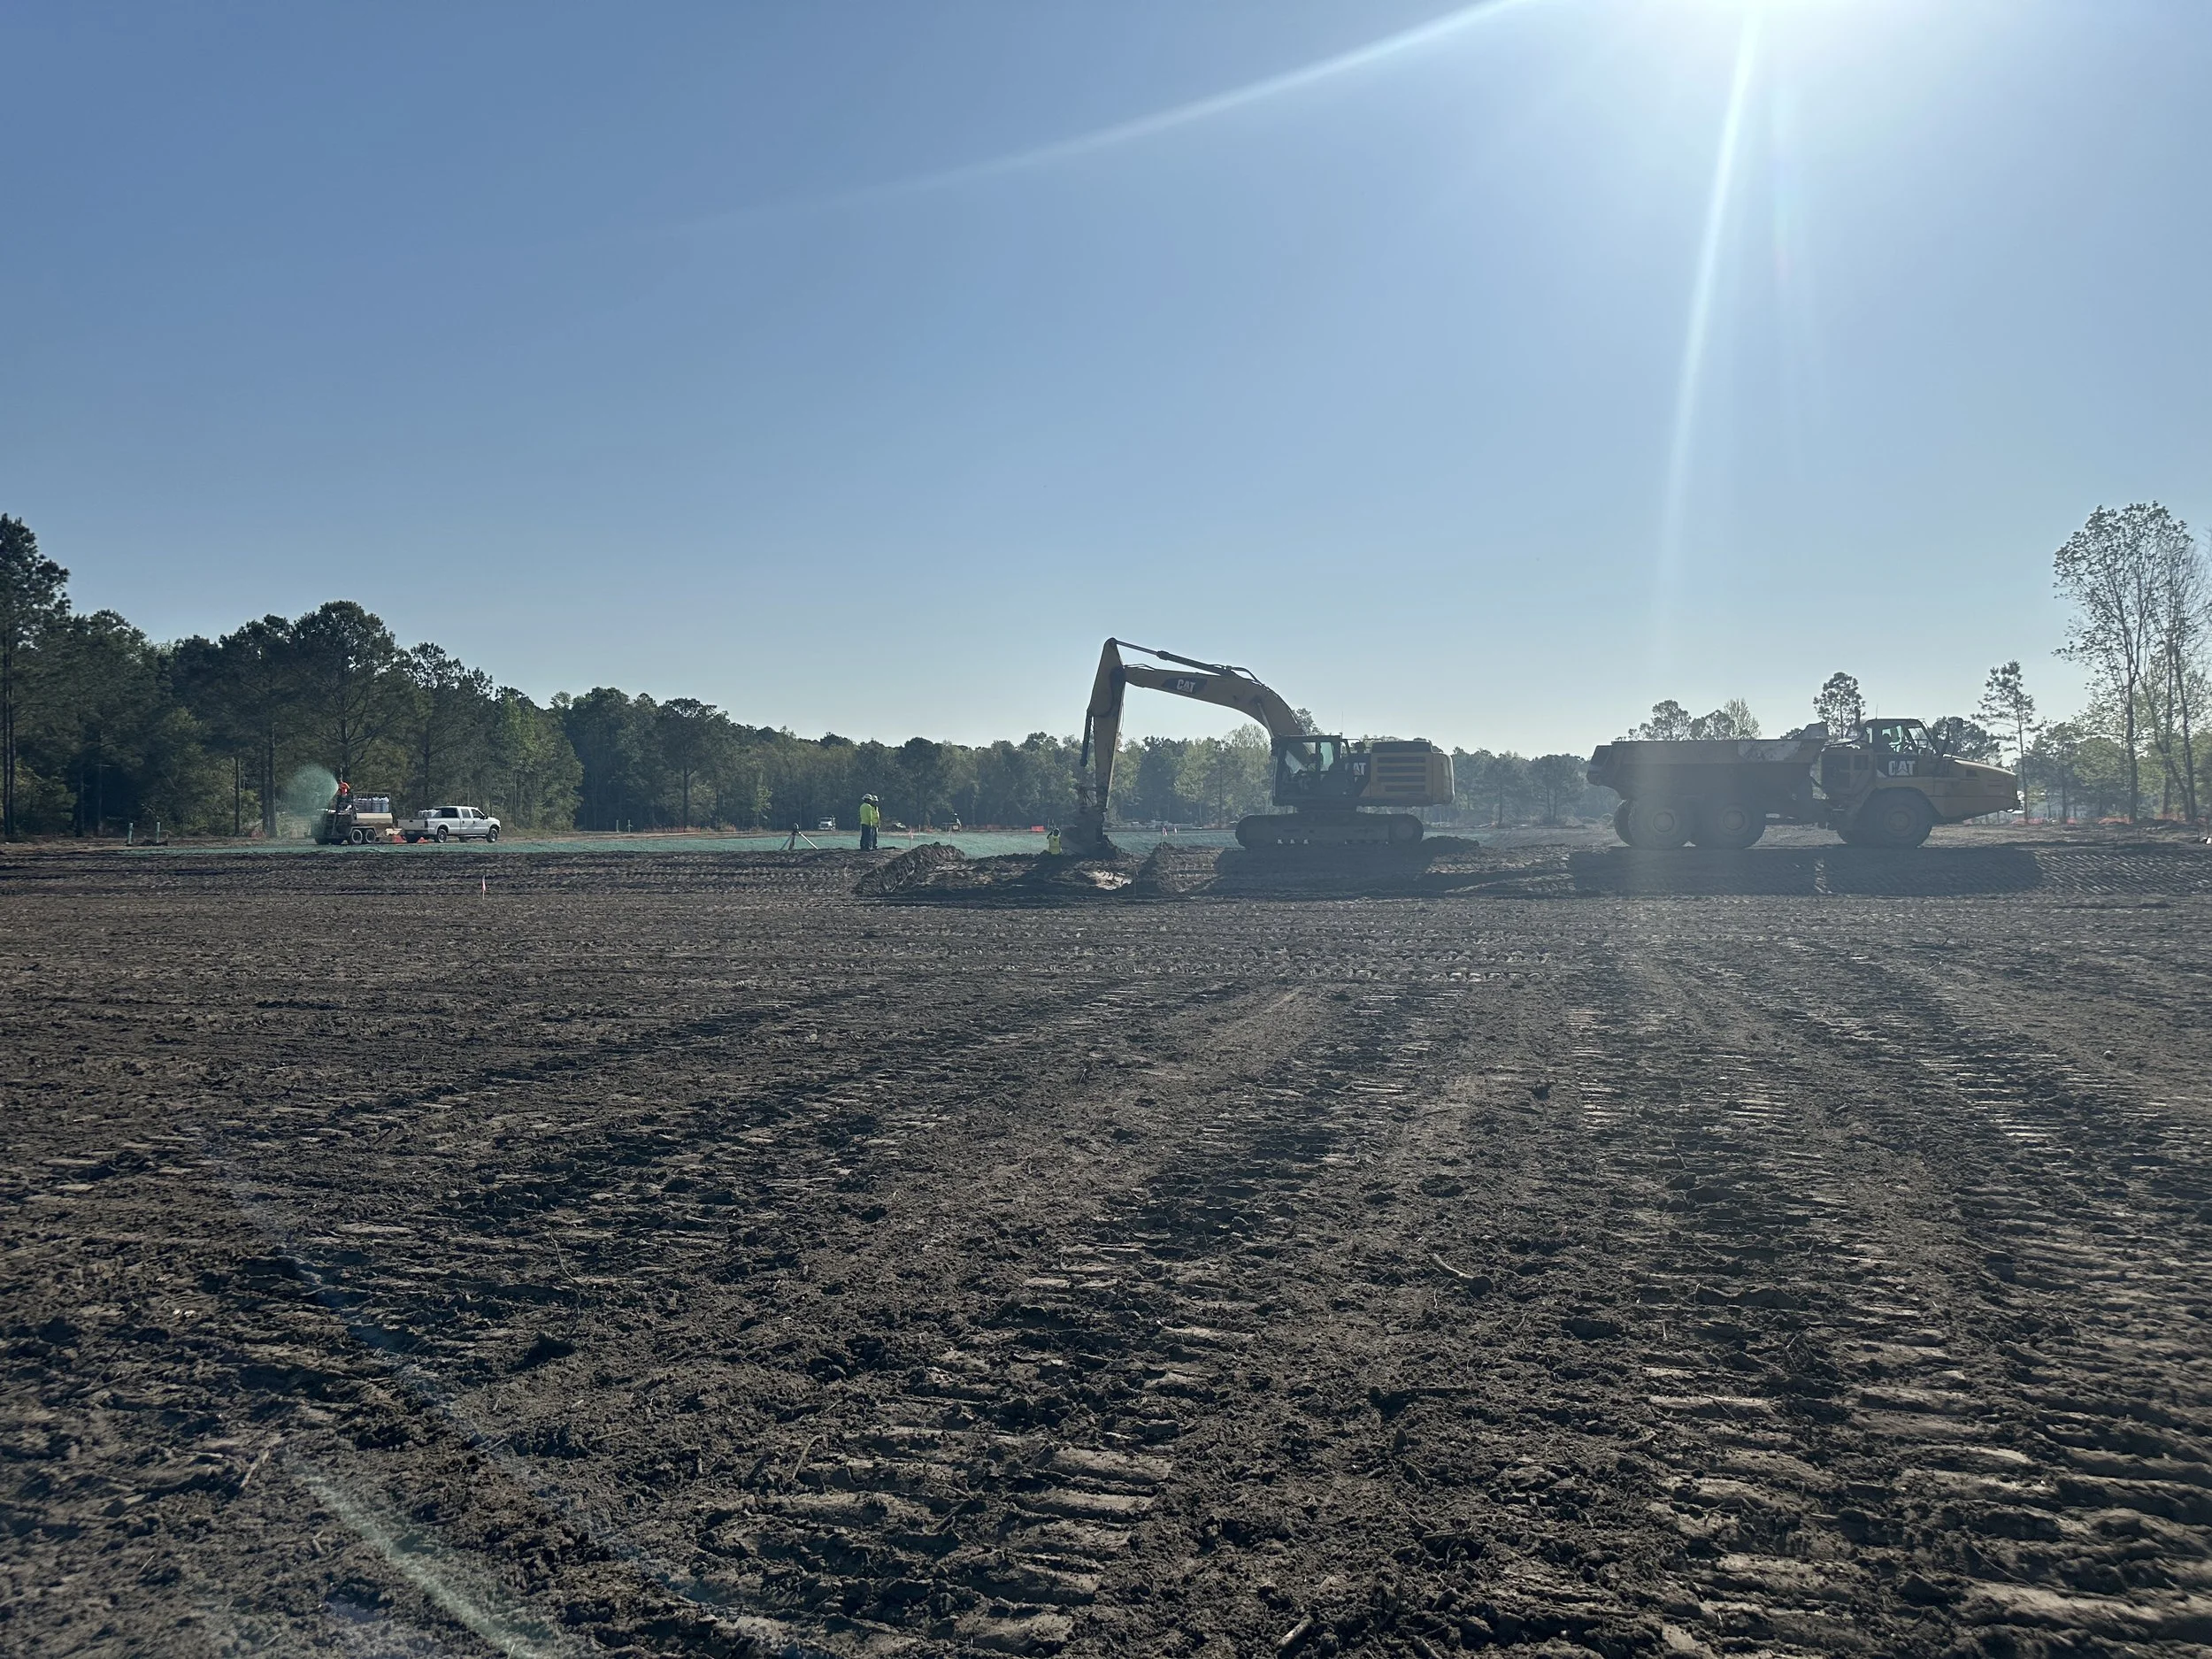
Work began on the installation of the weir wall between the wet pond and the dry pond. This is where the large pond will overflow into the dry pond during large rain events. The dry pond will have a large French Drain down the middle so that most overflow will drain underground and not remain on the surface.

Look carefully. Fish! It’s amazing how nature finds a way. We only have a couple of inches of water in the new ponds, which has come from groundwater, and there are somehow already fish in the water!
In the next series of pictures, you’ll be taken through the process of tapping the main water line and what that entails. We tried to capture each of the steps to show what was causing all of the traffic detours last week. In the previous post, we summarized what happens and explained that the plan was to do 2 on Tuesday and 2 on Thursday. The crew was only able to get one done on Tuesday because the second one wasn’t holding pressure to BJWSA’s liking and the BJWSA had to leave to go to another scheduled tap. This forced the ambitious task of getting all 3 taps done on Thursday (to avoid another 2 week wait for BJWSA’s crew to be rescheduled). To J.R. Wilson’s credit, they got it done as well as got the pipes connected and extended across the road so that the holes could be filled in with flowable fill (a type of cement) and reopened for Friday. They did a great job.

One of the four locations in Cherokee Farms Road where the main water line was exposed in a hole for the crew to attach the new water pipes to. These are the locations for the water taps.
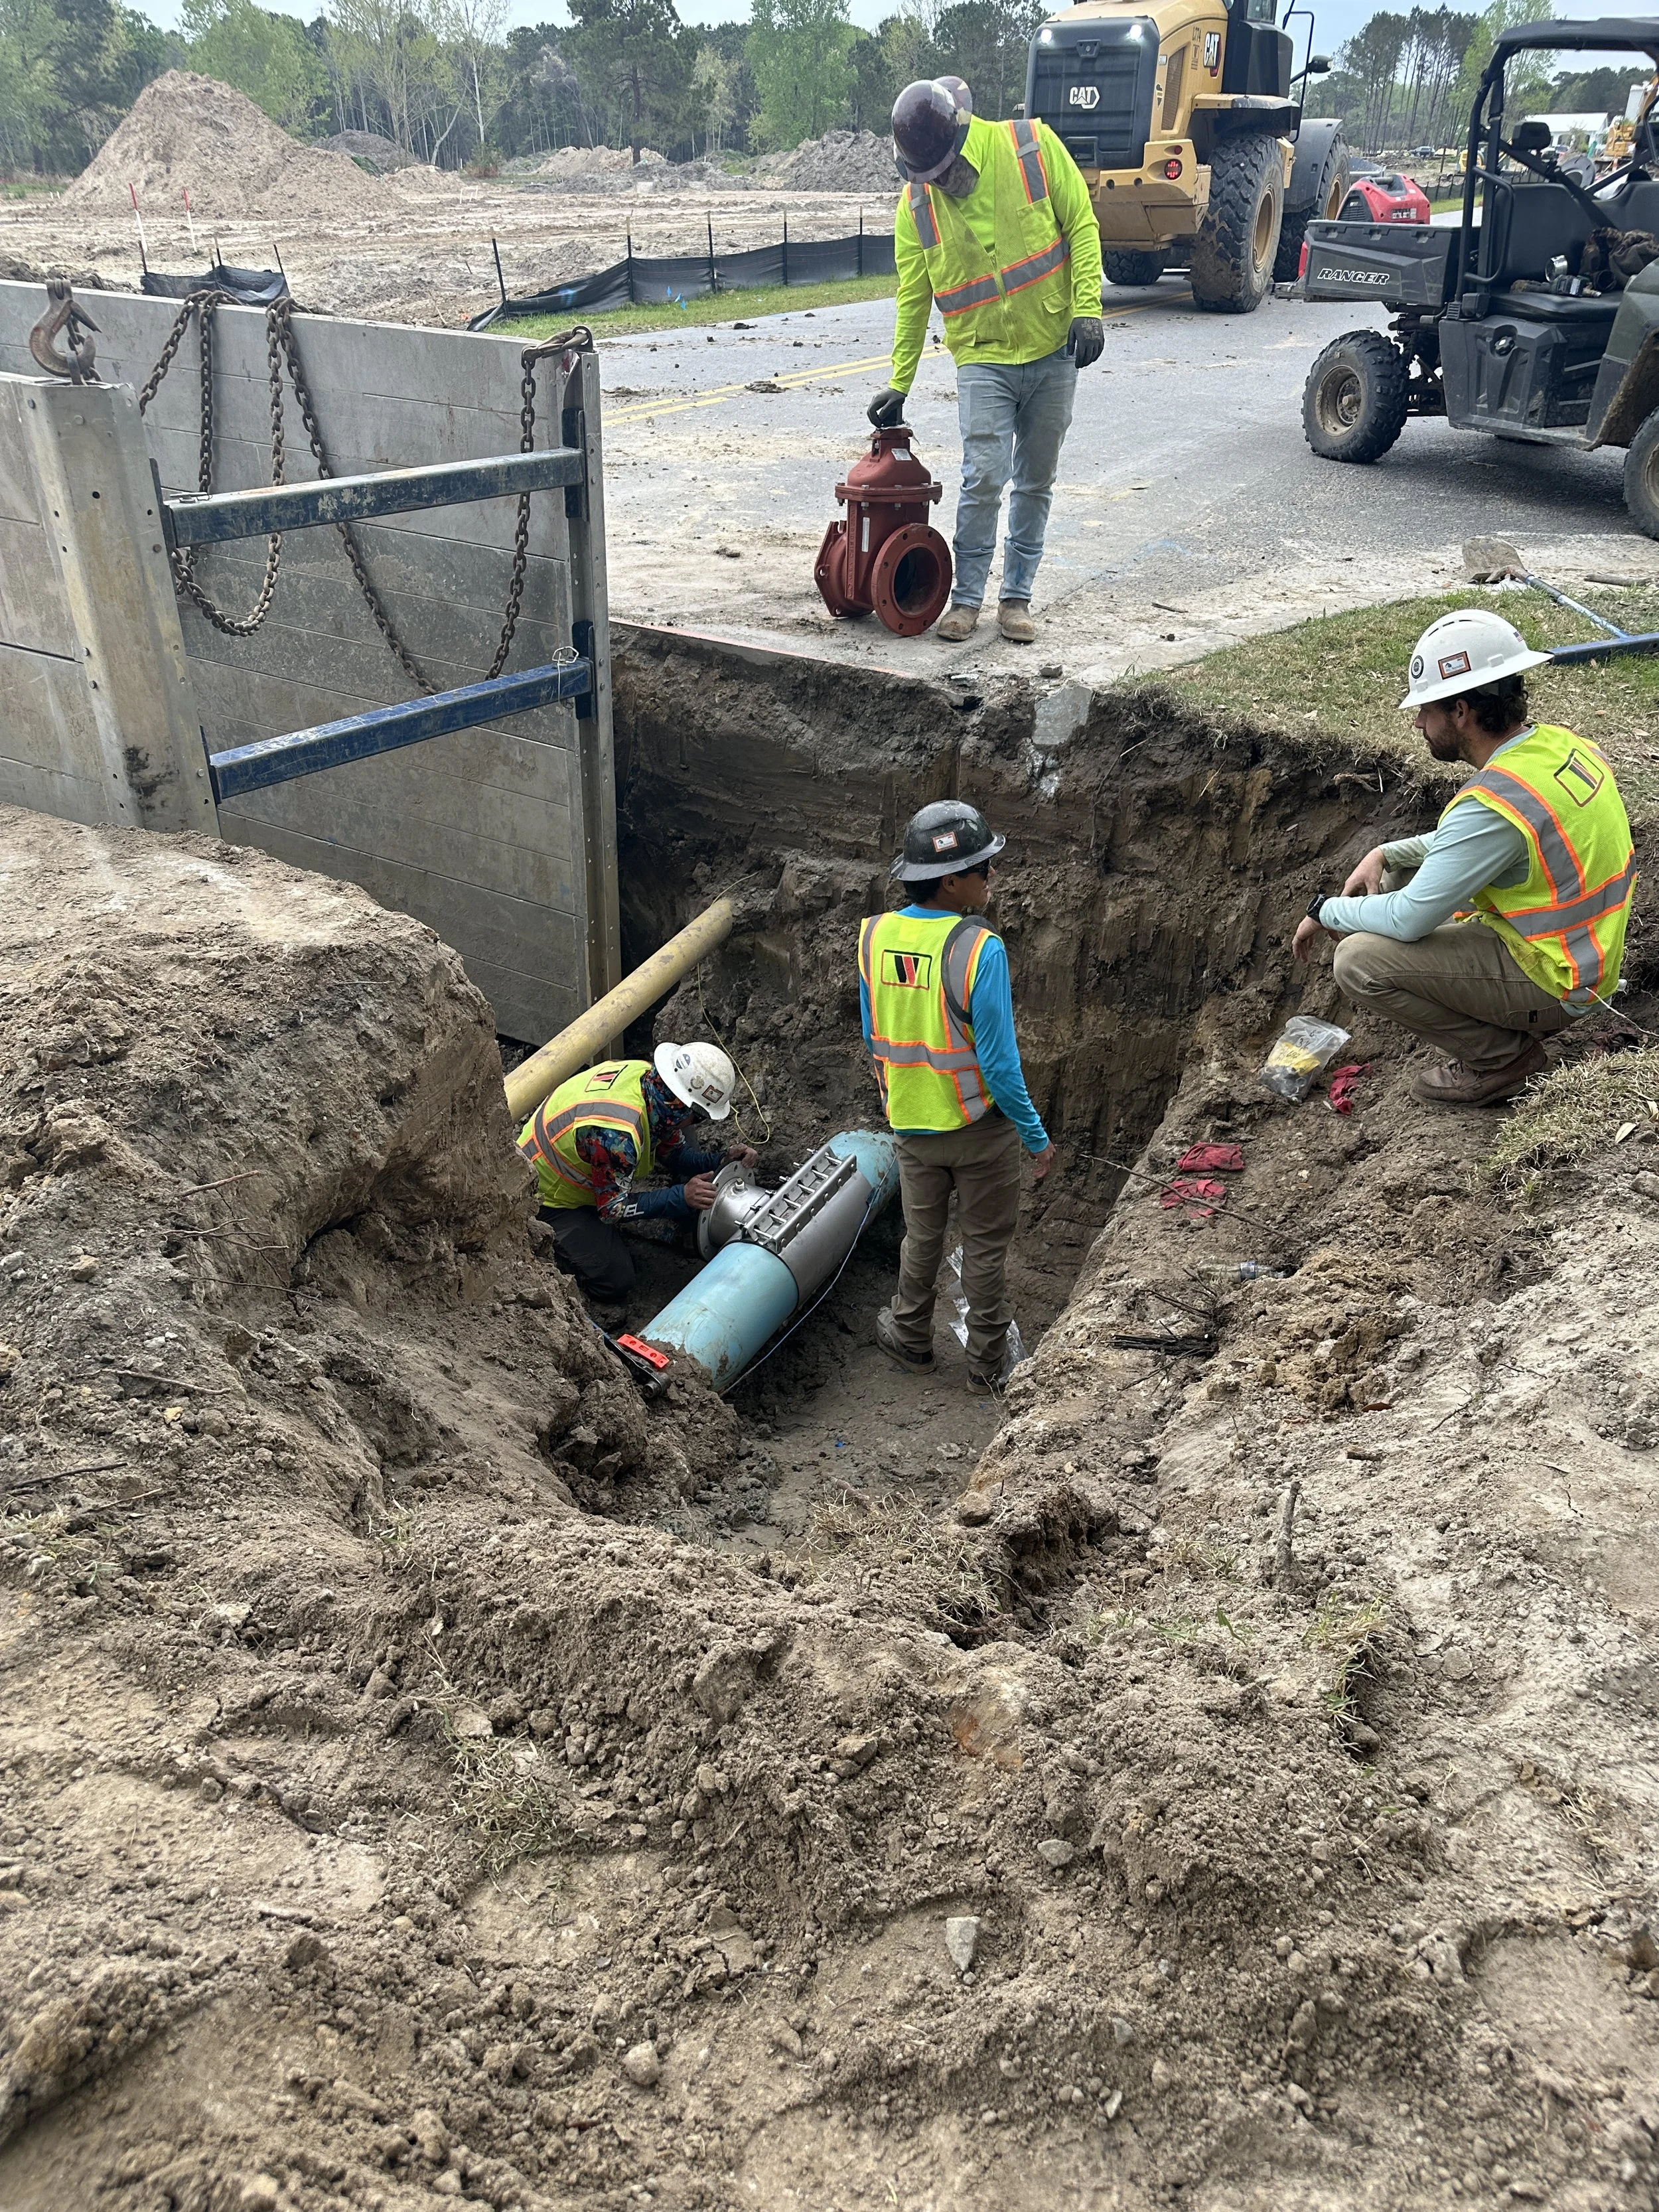
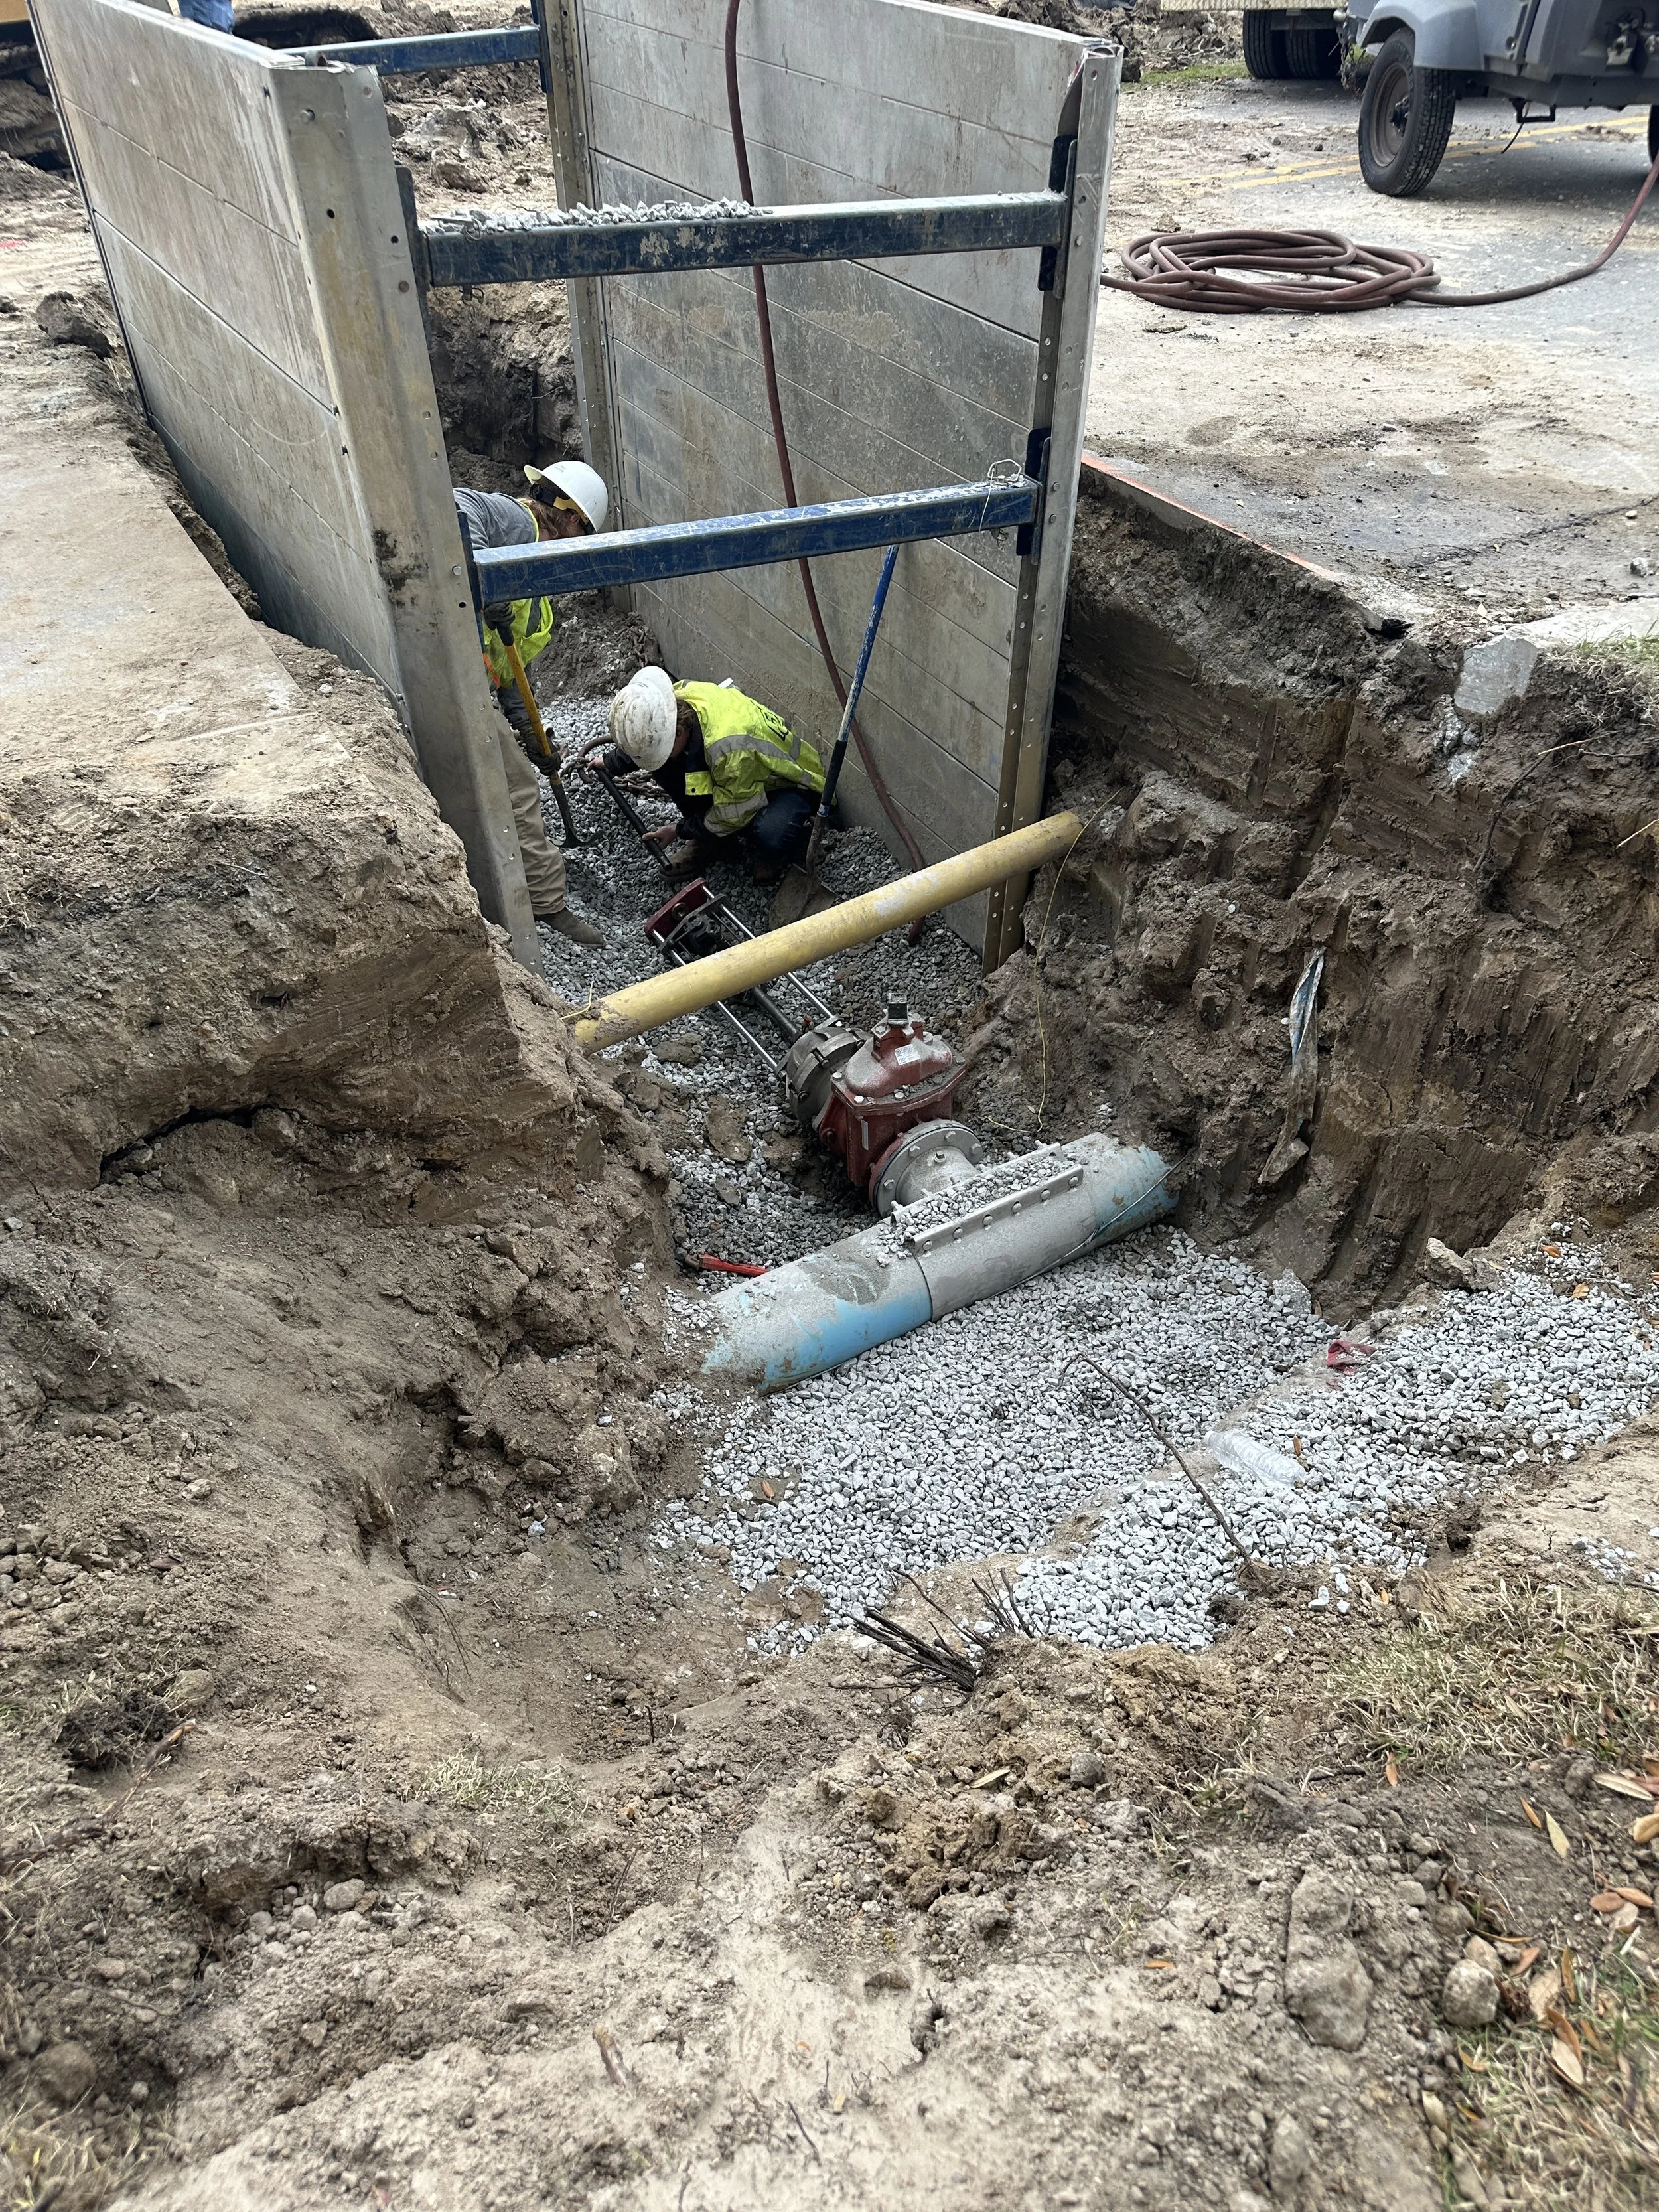
Some quick orientation so you know what you’re looking at in the next few pictures. The large metal panels in the hole is called a trench box. A trench box creates a safe working space down in a hole that is deeper than 4 feet, to keep the sides from caving in. The light blue pipe is the 10” water main that carries all of the water for Habersham. The yellow pipe is the 4” gas main that carries all of the gas for Habersham. It has to be worked around carefully and was just barely out of the way enough to not cause issues. What the guy in the hole is putting on, which is gray, is the tapping saddle. This is what clamps around the water main and has the tee come off of it where the hole will be cut into the water main. The red piece the guy is leaning on up top is the valve. It will connect to the tapping saddle and will close off the water once the hole is drilled and before the saw is removed.
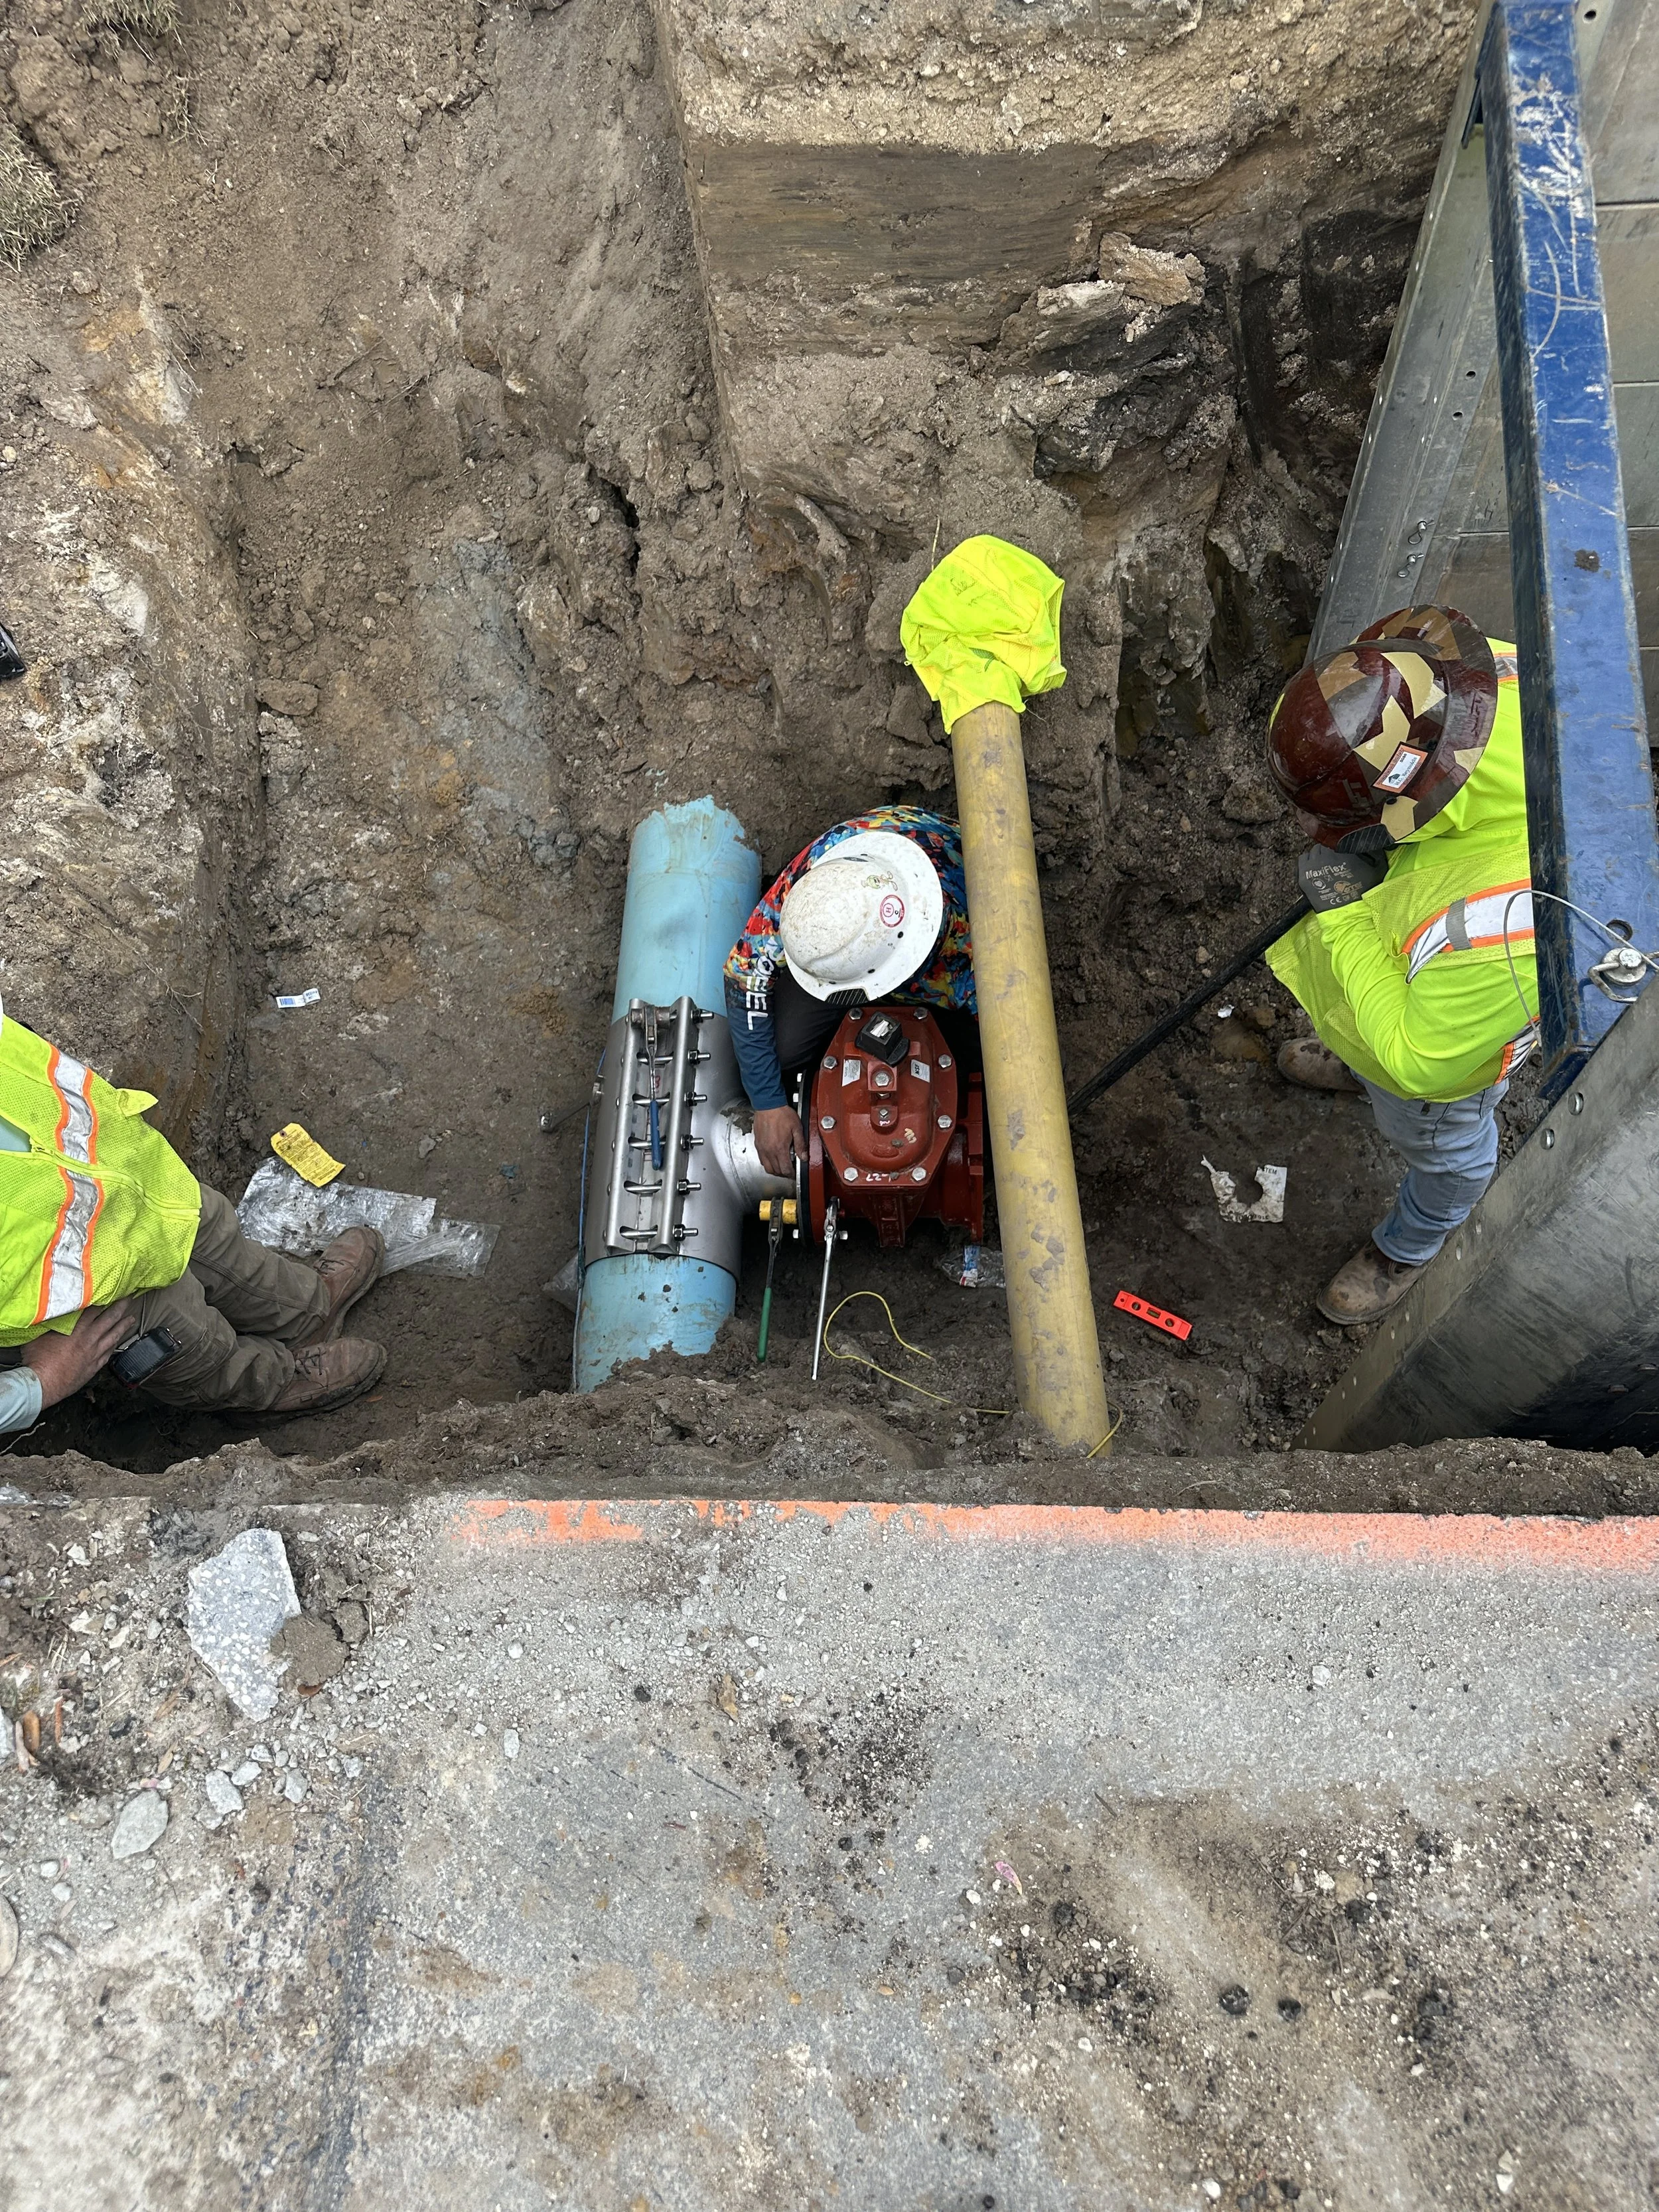
The valve is being attached to the saddle. There are about a dozen large bolts that clamp the two together. In this picture you can see how close the gas line was to getting in the way. On top of the valve, you can see a black little cube looking object, which is what is turned with a special tool to open and close the valve. To access that from the surface, a tube will be put on top of that and go all the way up to the road (called a valve box), so you can imagine the issue if that gas line had been over the top of where that valve knob is! Some things you just don’t know until you get down there!
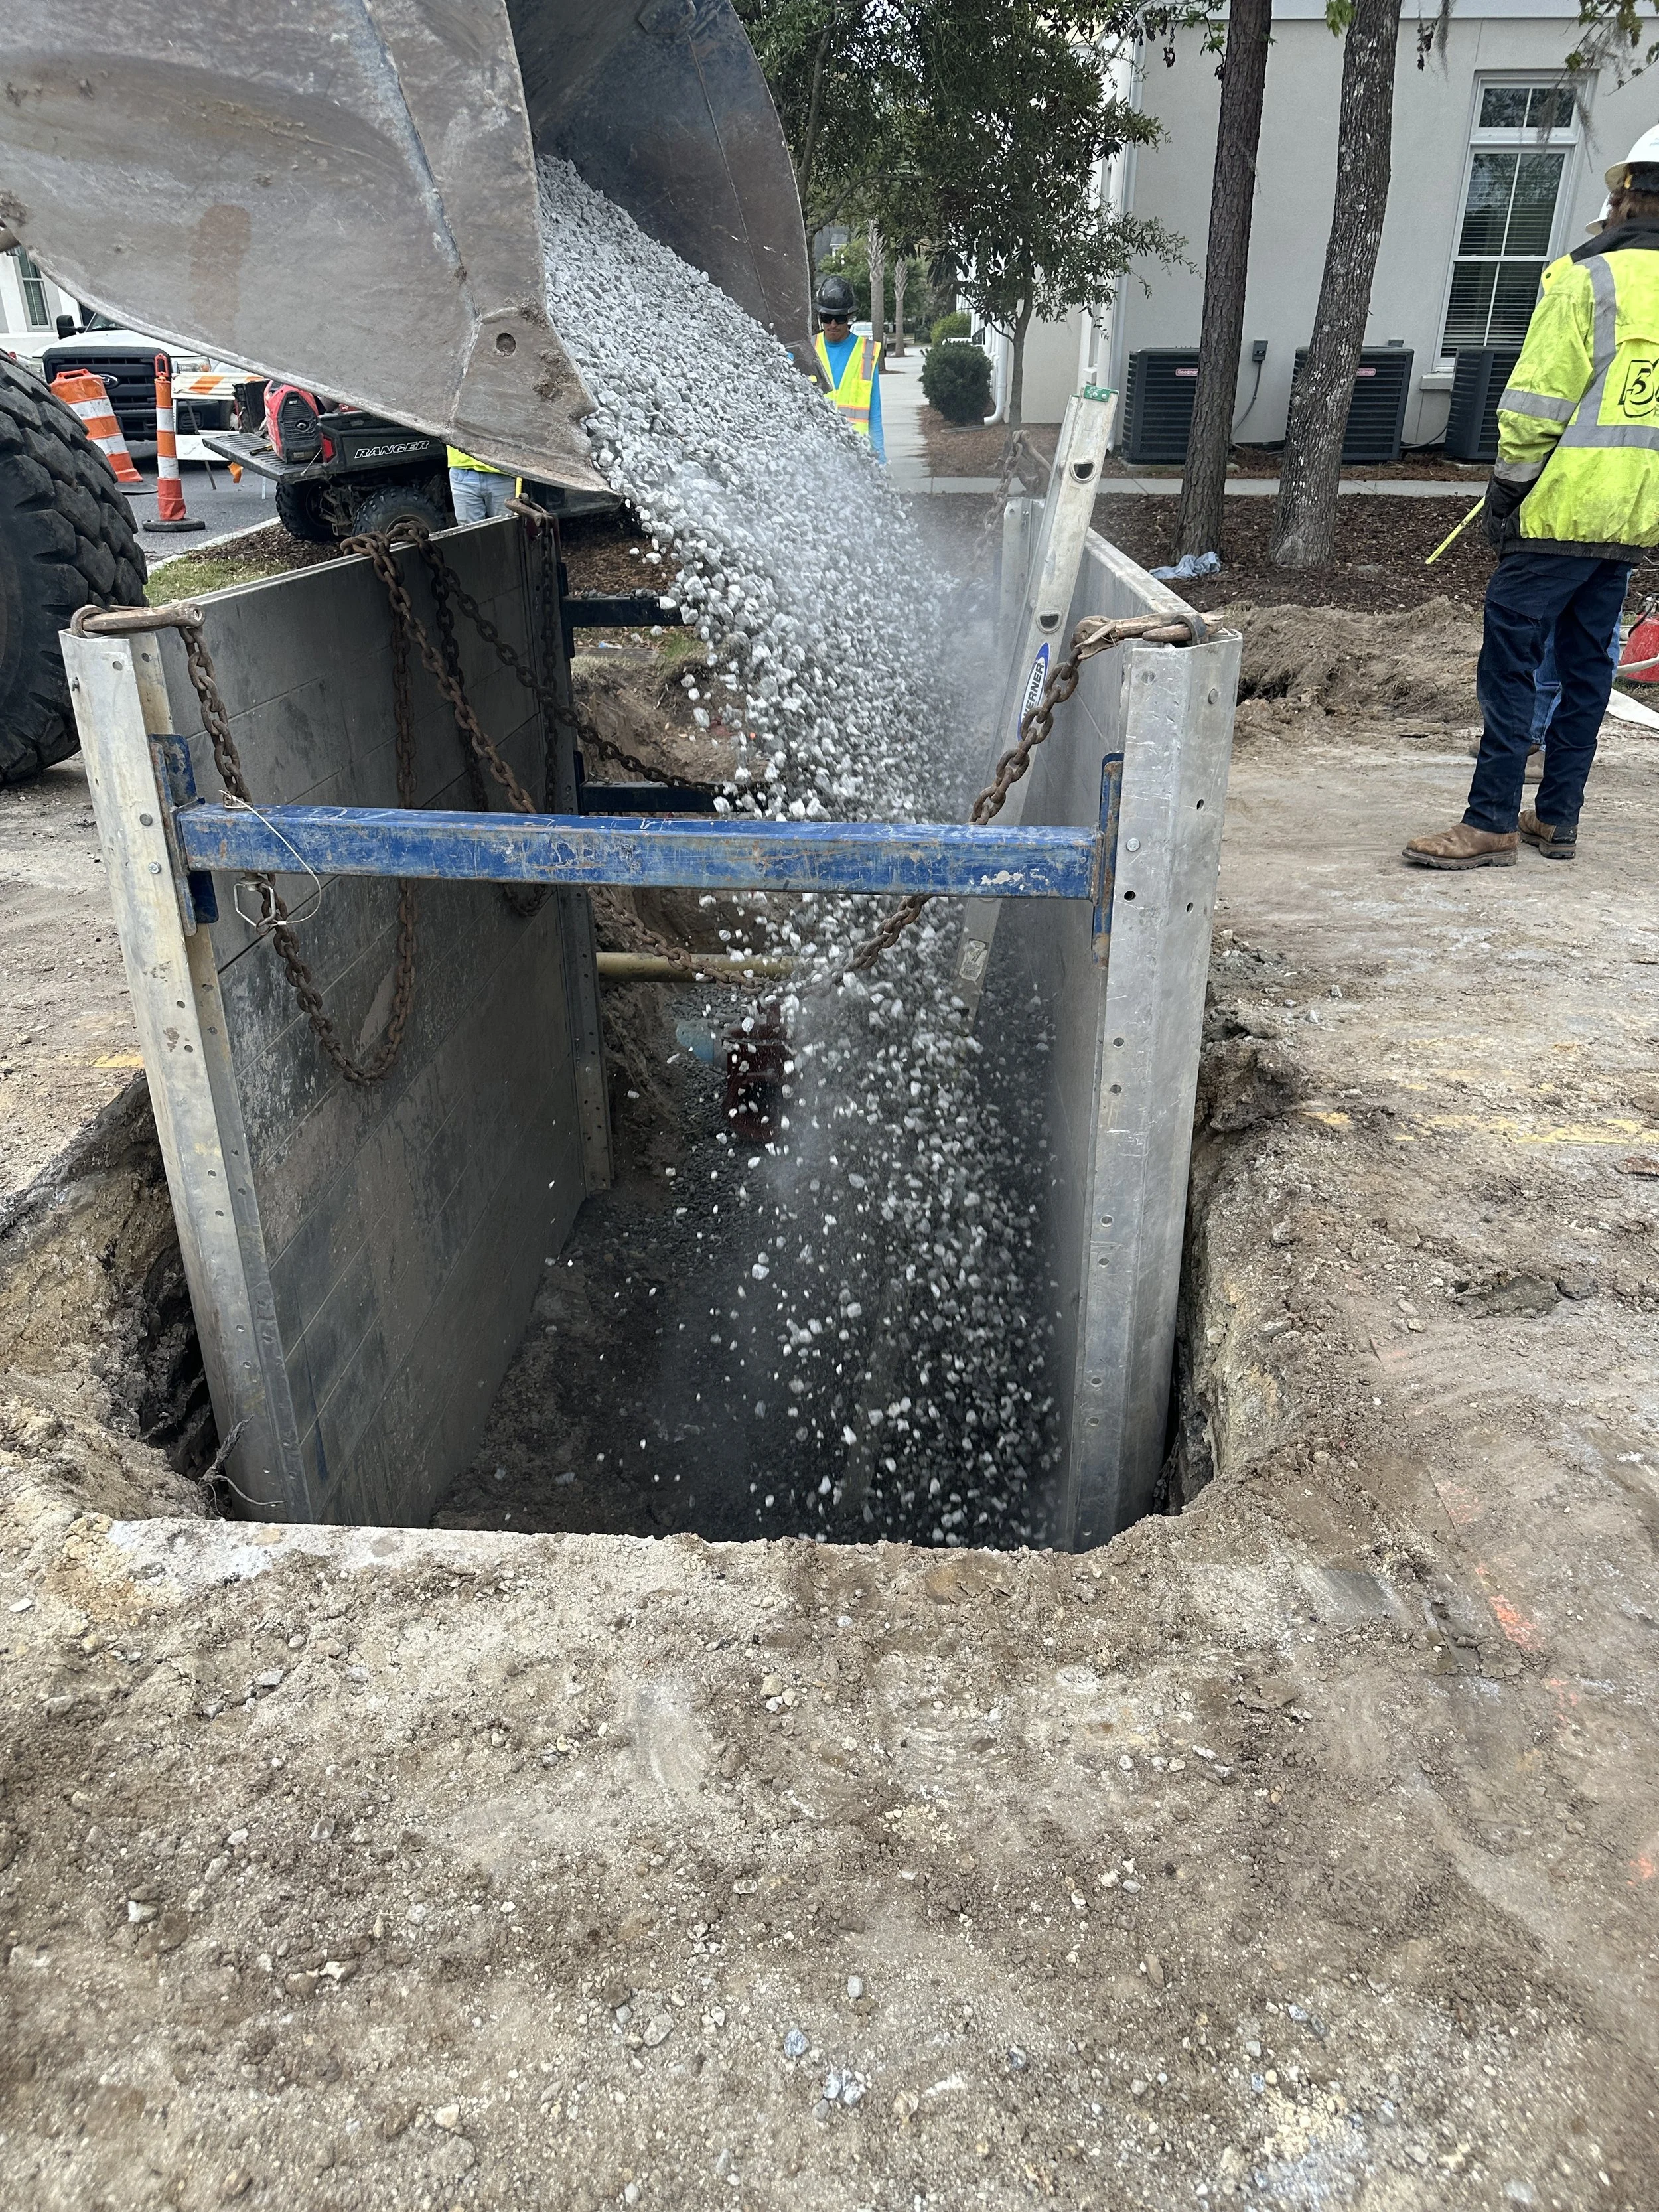
Rock is then added to the entire trench for a proper bedding for the pipes.

The next thing that happens is pressure testing the saddle. Above we saw the dozen bolts clamping the saddle and the valve together. That seal is very important to be water tight because when the valve is closed, there will be a lot of pressure there, so this is tested before the hole is drilled into the main water line. They close the valve and then connect a gauge and a hose to to the top of the tee in the saddle, where they will fill that small area with water pressurized to something like 150 PSI (I can’t remember exactly). BJWSA requires this to hold with for 20 minutes without the needle on that gauge to move even the slightest bit. They take a picture of the gauge when it starts and at the end and compare the two to see if there is any variation whatsoever. This is what the second one ran into on Tuesday. The needle kept moving the tiniest fraction. They ended up taking everything off and starting over and passed on Thursday.
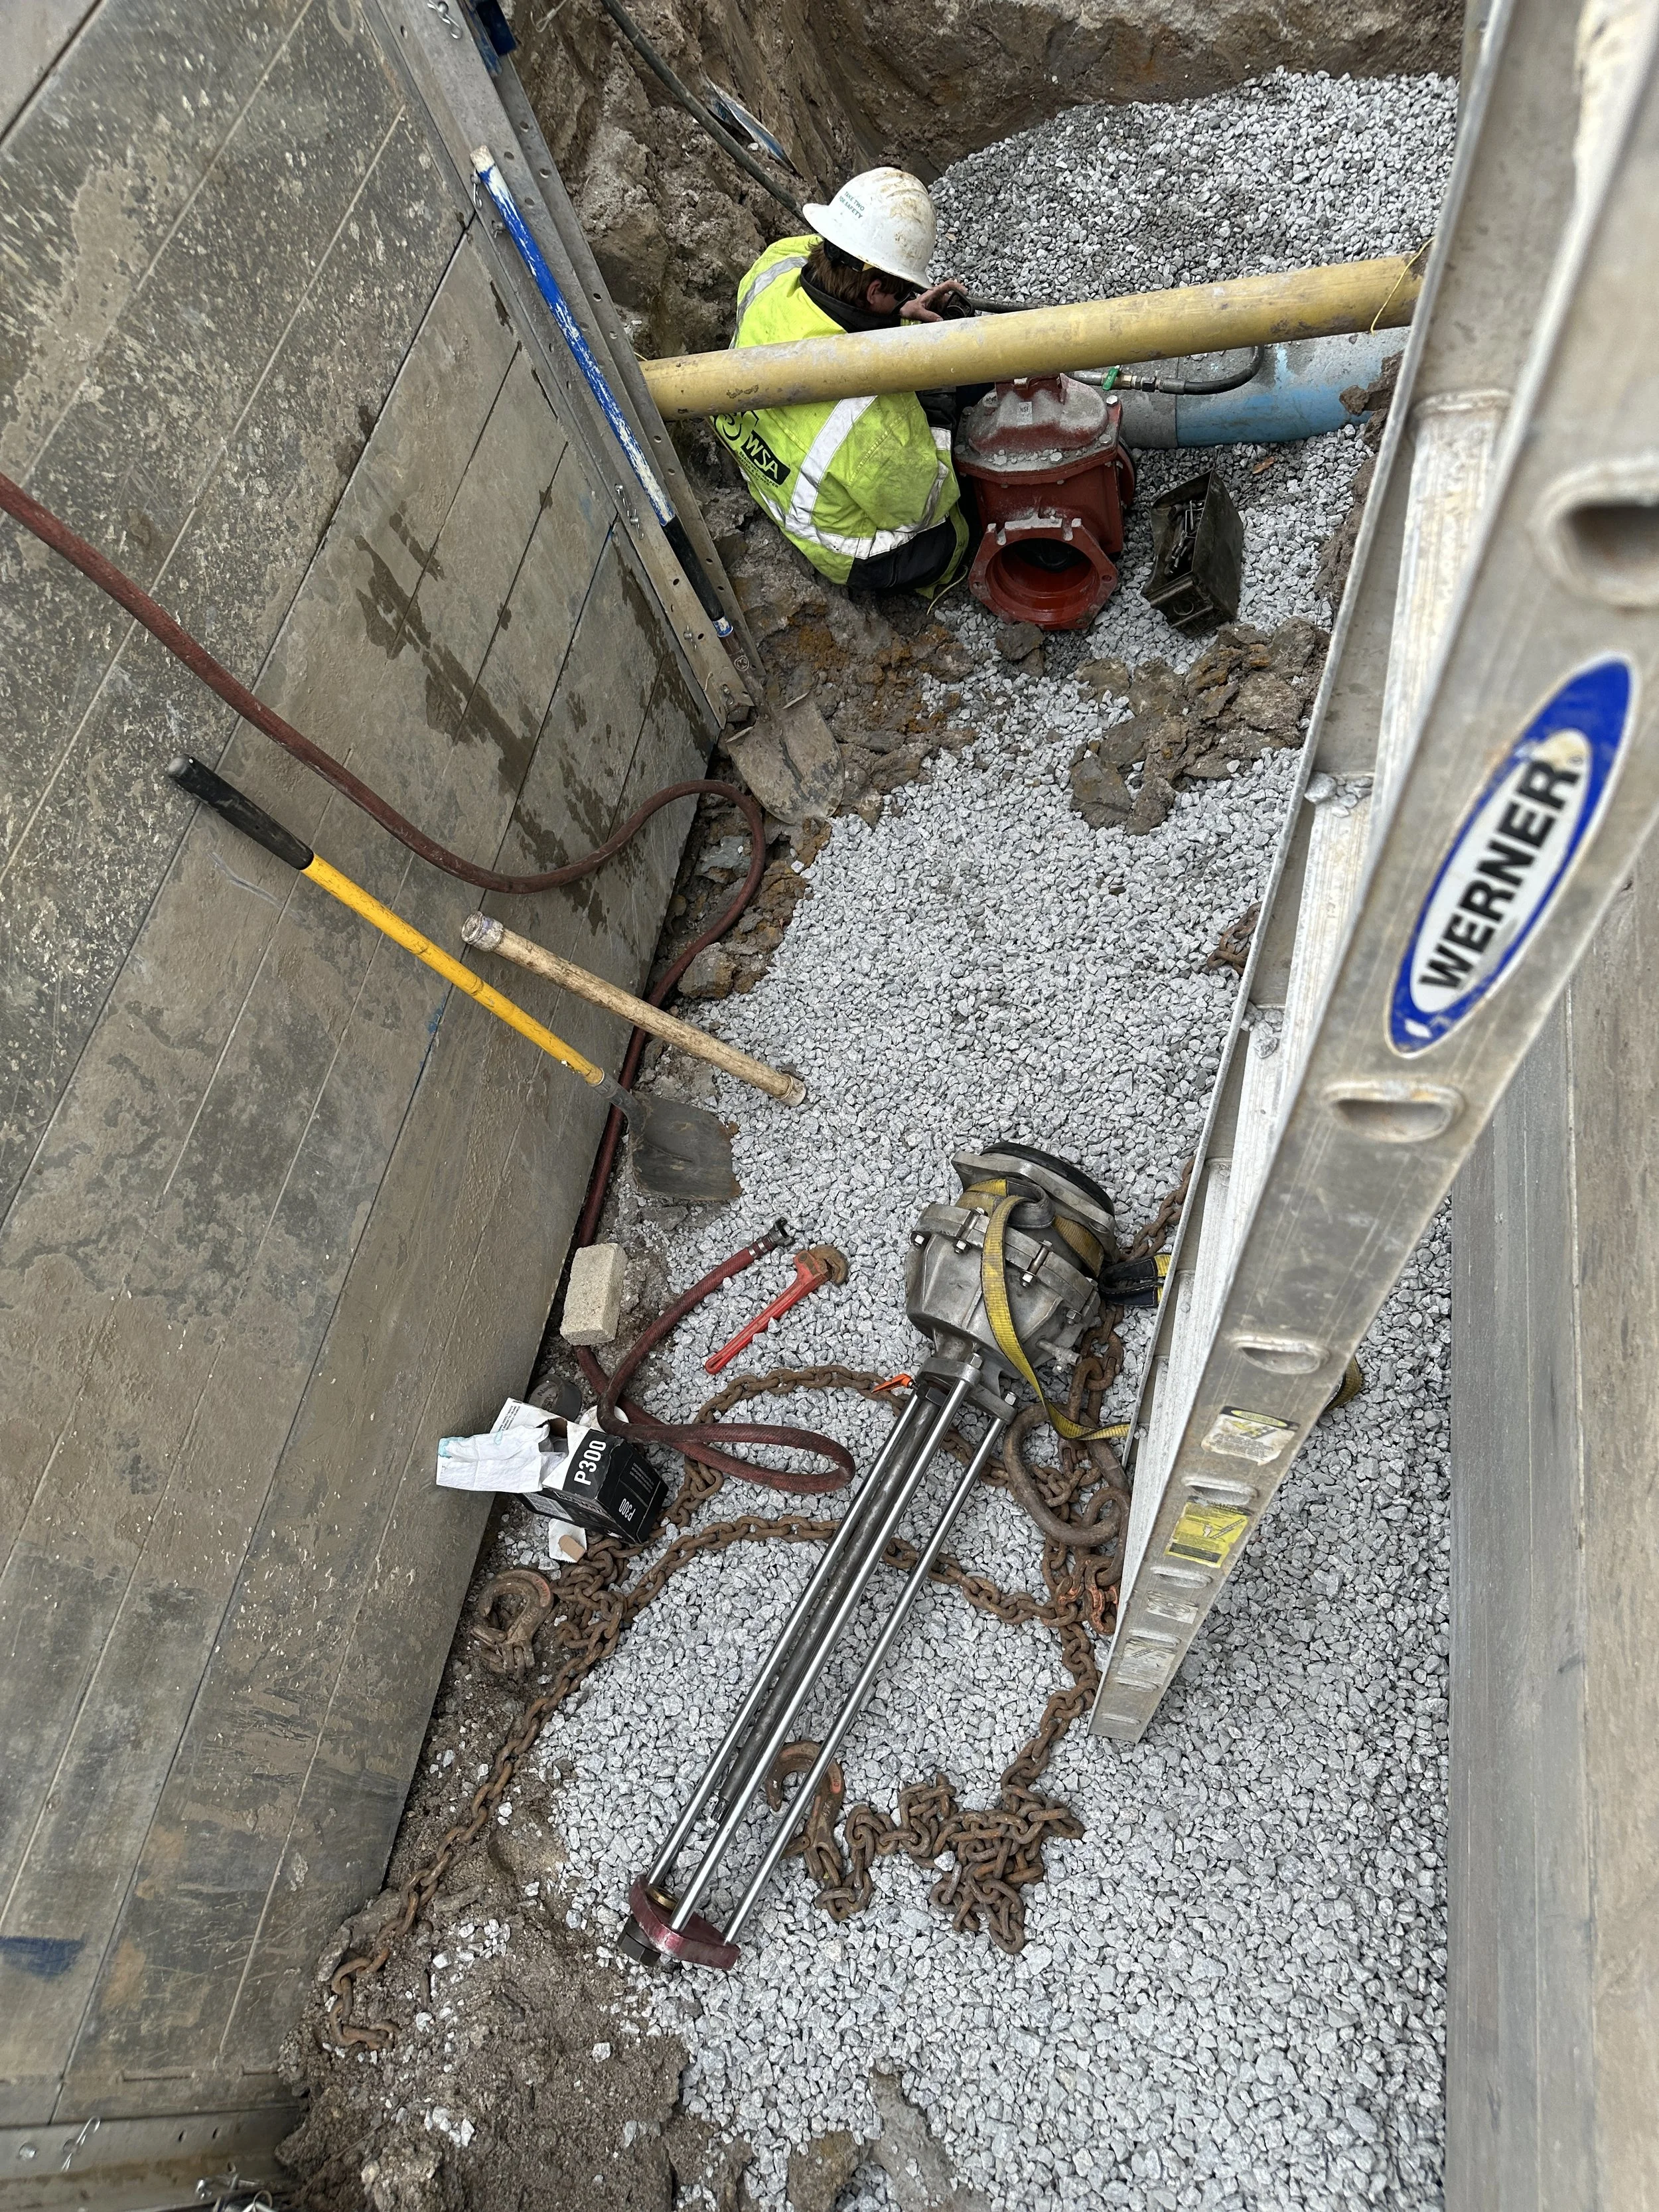
Now it’s BJWSA’s turn to get in the hole. They are satisfied with the pressure test and are ready to tap the water main. Down in the trench are there needed tools. The main tool is the tapping saw, which is the long object laying down on the rocks. You can see at one end where there are another dozen or so bolts, which is where they will attach the tapping saw to the red valve. This has to be attached just like the valve was attached to the tapping saddle because once that saw punches through, it will be pressurized from the water main until they can pull the saw back behind the valve and close the valve to safely remove the saw. The connection doesn’t have to test since it is a temporary connection, so you’ll see water coming out of that seal when the hole gets tapped.
Here you can see the tapping saw has been attached to the red valve and they are inserting the rod to the saw that will push the hole saw forward through the valve into the water main.
Turn the volume up and you can hear the saw running. The operator is turning the shaft to slowly move the saw forward through the valve and saddle to the water main. They have marked on the shaft the place to stop so that they do not cut through the other side of the water main since they can’t see where the cut is being made.
In this video, you can see the hole has been made because you can see the pressure of the water coming out of where the saw is attached to the valve. The saw will be slowly backed out and the valve will be closed so that the saw can be removed safely.
The only thing left after the hole is cut is to attach the pipe, which we’ve seen pictures of in previous posts. So this was done 4 times in 4 locations down Cherokee Farms Road, completing the water infrastructure for Phase 7. There will be one more crossing done across Cherokee Farms Road for the sewer connection, which should be happening sometime in the next few weeks.
For now, the crew will continue to set the correct heights of stormdrain grates and manholes and mortaring those in place while the grading crew continues to prepare the roads and alleys.