
Sewer Piping Almost Complete
My apologies for going 4 weeks without an update. With a dry November, things were moving very fast and we were working feverishly to stay ahead of problems. Then, Thanksgiving week hit and here we are with an update 2 weeks late.
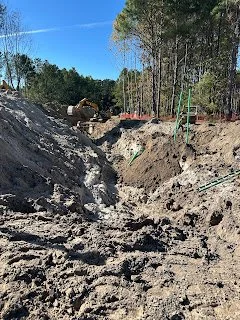
Since the last update, J.R. Wilson completed 90% of the sewer for the project. They were able to really capitalize on dry weather and move very quickly. Most of the pictures in this update show parts of that progress. It’s not the most exciting thing to look at, but it’s better than water pipes because it at least goes up and down and through manholes! The pictures are meant to show you what is underground and what your house ties into. It may be unimportant to some and interesting to others.
As we’ve mentioned before, a lot of horizontal construction is done in layers. You start with the deepest components (typically sewer here) and then work up. Sewer, stormwater and water are all your wet utilities and they are carefully profiled by the engineer because there are not only horizontal separation requirements (i.e., water and sewer pipes have to be separated by 10’), but there are also vertical separation requirements. When you have sewer and stormwater being gravity dependent, this gets very tricky because you’re constantly changing elevation and a consistent slope must be kept. So, if you need to raise a pipe up to get the required separation over a crossing, then you’ve just changed the elevation for the entire run of pipe, which could be hundreds of feet and most likely caused an issue somewhere else. Thankfully, all of this is worked out by the engineers before construction begins.
Dry Utilities are things like power, telecommunications, street lighting, etc. Unfortunately the dry utility companies are the ones who have to design their own layout and they really don’t take wet utility depths into consideration, yet they have their own depth and separation requirements. The developer is responsible for putting in sleeves for road crossings for the dry utility companies. So, one thing that has kept us busy in the past month is figuring out these sleeve depths. There are about 40 sleeve crossings we have to put in and each one of them may have 3-5 sleeves (i.e., one or two for power, one for Brightspeed, one for Sparklight, and sometimes one for streetlight). Many of these crossings are over or under sewer pipe, storm pipe, and water pipe. The power company wants everything to be 48” deep, but then they also can’t be much more than 5’ deep because they don’t have equipment to dig much deeper. This presents a different challenge at each crossing. Each one had to be carefully worked out and then negotiated with the power company when their requirements couldn’t be met. In a few instances, we will be responsible for encasing the entire crossing in concrete due to a forced shallow depth or being too close to another utility. Because the sewer was going in so quickly, there was a lot of scrambling to get these crossings worked out before they started any storm water or water that a dry utility crossing may need to go under. You definitely don’t want to have to go back and install something underneath something else!
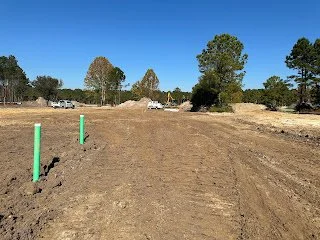
This is looking down Zeb Run, with future houses on the right where the pine trees are and a pond on the left behind the giant pile of dirt. The whole road is trenched down and the main sewer line is already in. What this is showing is where the sewer service lines come up to the house lots. Those tall green pipes will be cut off, but that is the sewer line that comes up from the main line and is stubbed up on a lot corner for a future house to connect into.
This is a view up Louis Pinckney Sr. Avenue and shows two sewer service stub ups for two adjoining lots. So, this is what is visible above ground once everything from the previous picture is buried.
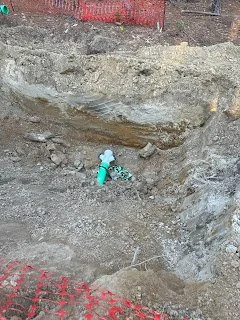
If you zoom in, you’ll see the white fitting on the end is a “Y”. This is where those stub ups shown in the previous pictures originate. This picture shows a sewer service that is coming off of a main line (that is buried). The Y is where the two service lines split off and turn upwards, one going to one lot corner, and the other to the other lot corner, just as you saw in the previous picture. Typically, sewer services come in pairs like this, with adjoining lots sharing the same lateral off the main.
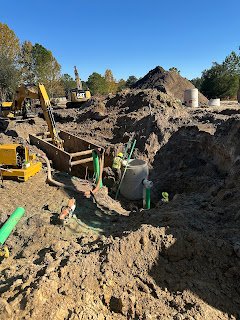
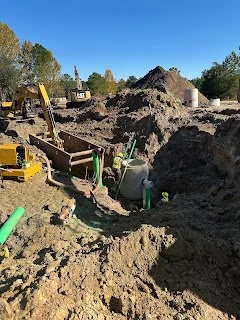
Setting a manhole section in place. The green pipe next to is not sewer pipe even though it is the same color. This is something called a “whistle,” which is a colloquial term, and you’ll see this throughout the project for the duration of the project. Similar to the well points mentioned in a previous post, these are used to remove groundwater from an area. A hose is dropped down into this pipe with some rock and connected to a pump to pump the water out.
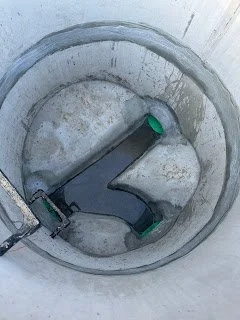
Looking down into a manhole. A manhole basically serves as access points to the pipes where they bend or tee. You can see the sewer just travels through cast channels that connect the pipes.
Look closely at this manhole being installed and you’ll see a pipe coming out the side of the manhole and going straight down. This is called a manhole drop and happens when a sewer line is coming into a manhole at a lot higher level than the bottom of the manhole where the deeper sewer line is exiting or passing through. As far as I know, I don’t think this is the way it was done when the earlier phases of Habersham were built. It used to be that you would just have that pipe come straight into the manhole and the sewer would just fall down into the manhole (waterfall style). The water utility company now requires these exterior drops to allow the sewer to drop to the lower level through the pipe and enter the manhole at the same level as the other connecting pipes. There are several reasons. The one that I think is somewhat comical is to prevent sewage from water falling down onto someone’s head while they may be down in the manhole working on something. Other reasons focus on minimizing turbulence. Sewage falling freely into the manhole produces more noxious gases and odors and it can also more speedily cause erosion and deterioration of the inside of the manhole.
These are two of the three live oaks that were found on the property other than the large ones up near Cherokee Farms Road. These trees actually didn’t show up on the tree survey because they were too small, but we found them in the field and realized they flanked either side of an alley entrance, so we had them saved. As you can see, the sewer goes right through the middle of them. A water line will have to go right next to one as well. The crew is doing everything they can to preserve these trees. They will undergo a good bit of stress from the large amount of disturbance in their root zone, but I hope they will make it.
This past month, we were also working on getting together all of the paperwork needed to legally record the platted lots. Once lots are recorded, you are legally allowed to sell a parcel as long as you bond 125% of the infrastructure cost (to prevent a developer from selling a lot and skipping town before roads or utilities are put in for that lot!). We got our plat recorded so that we could close on the parcels that Habersham Row is purchasing. They just received their water and sewer permits for their project and will hopefully be able to get all of their other needed permits in time to start construction in a few months.
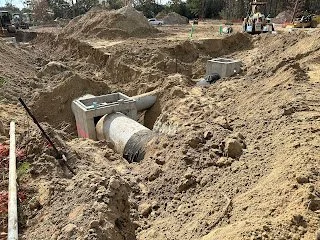
Stormwater pipes being joined into a box before being mortared in. The black fabric you see wrapped around the pipe goes around each pipe joint to help prevent dirt from getting into the cracks and causing a sinkhole.
So, what’s coming up? Stormwater pipes and boxes will be ongoing and some of the water lines will start going in in certain areas. Stormwater pipes will be the big concrete pipes and the water pipes are the bright blue pipes. Below is the map showing everything that is in the ground so far.
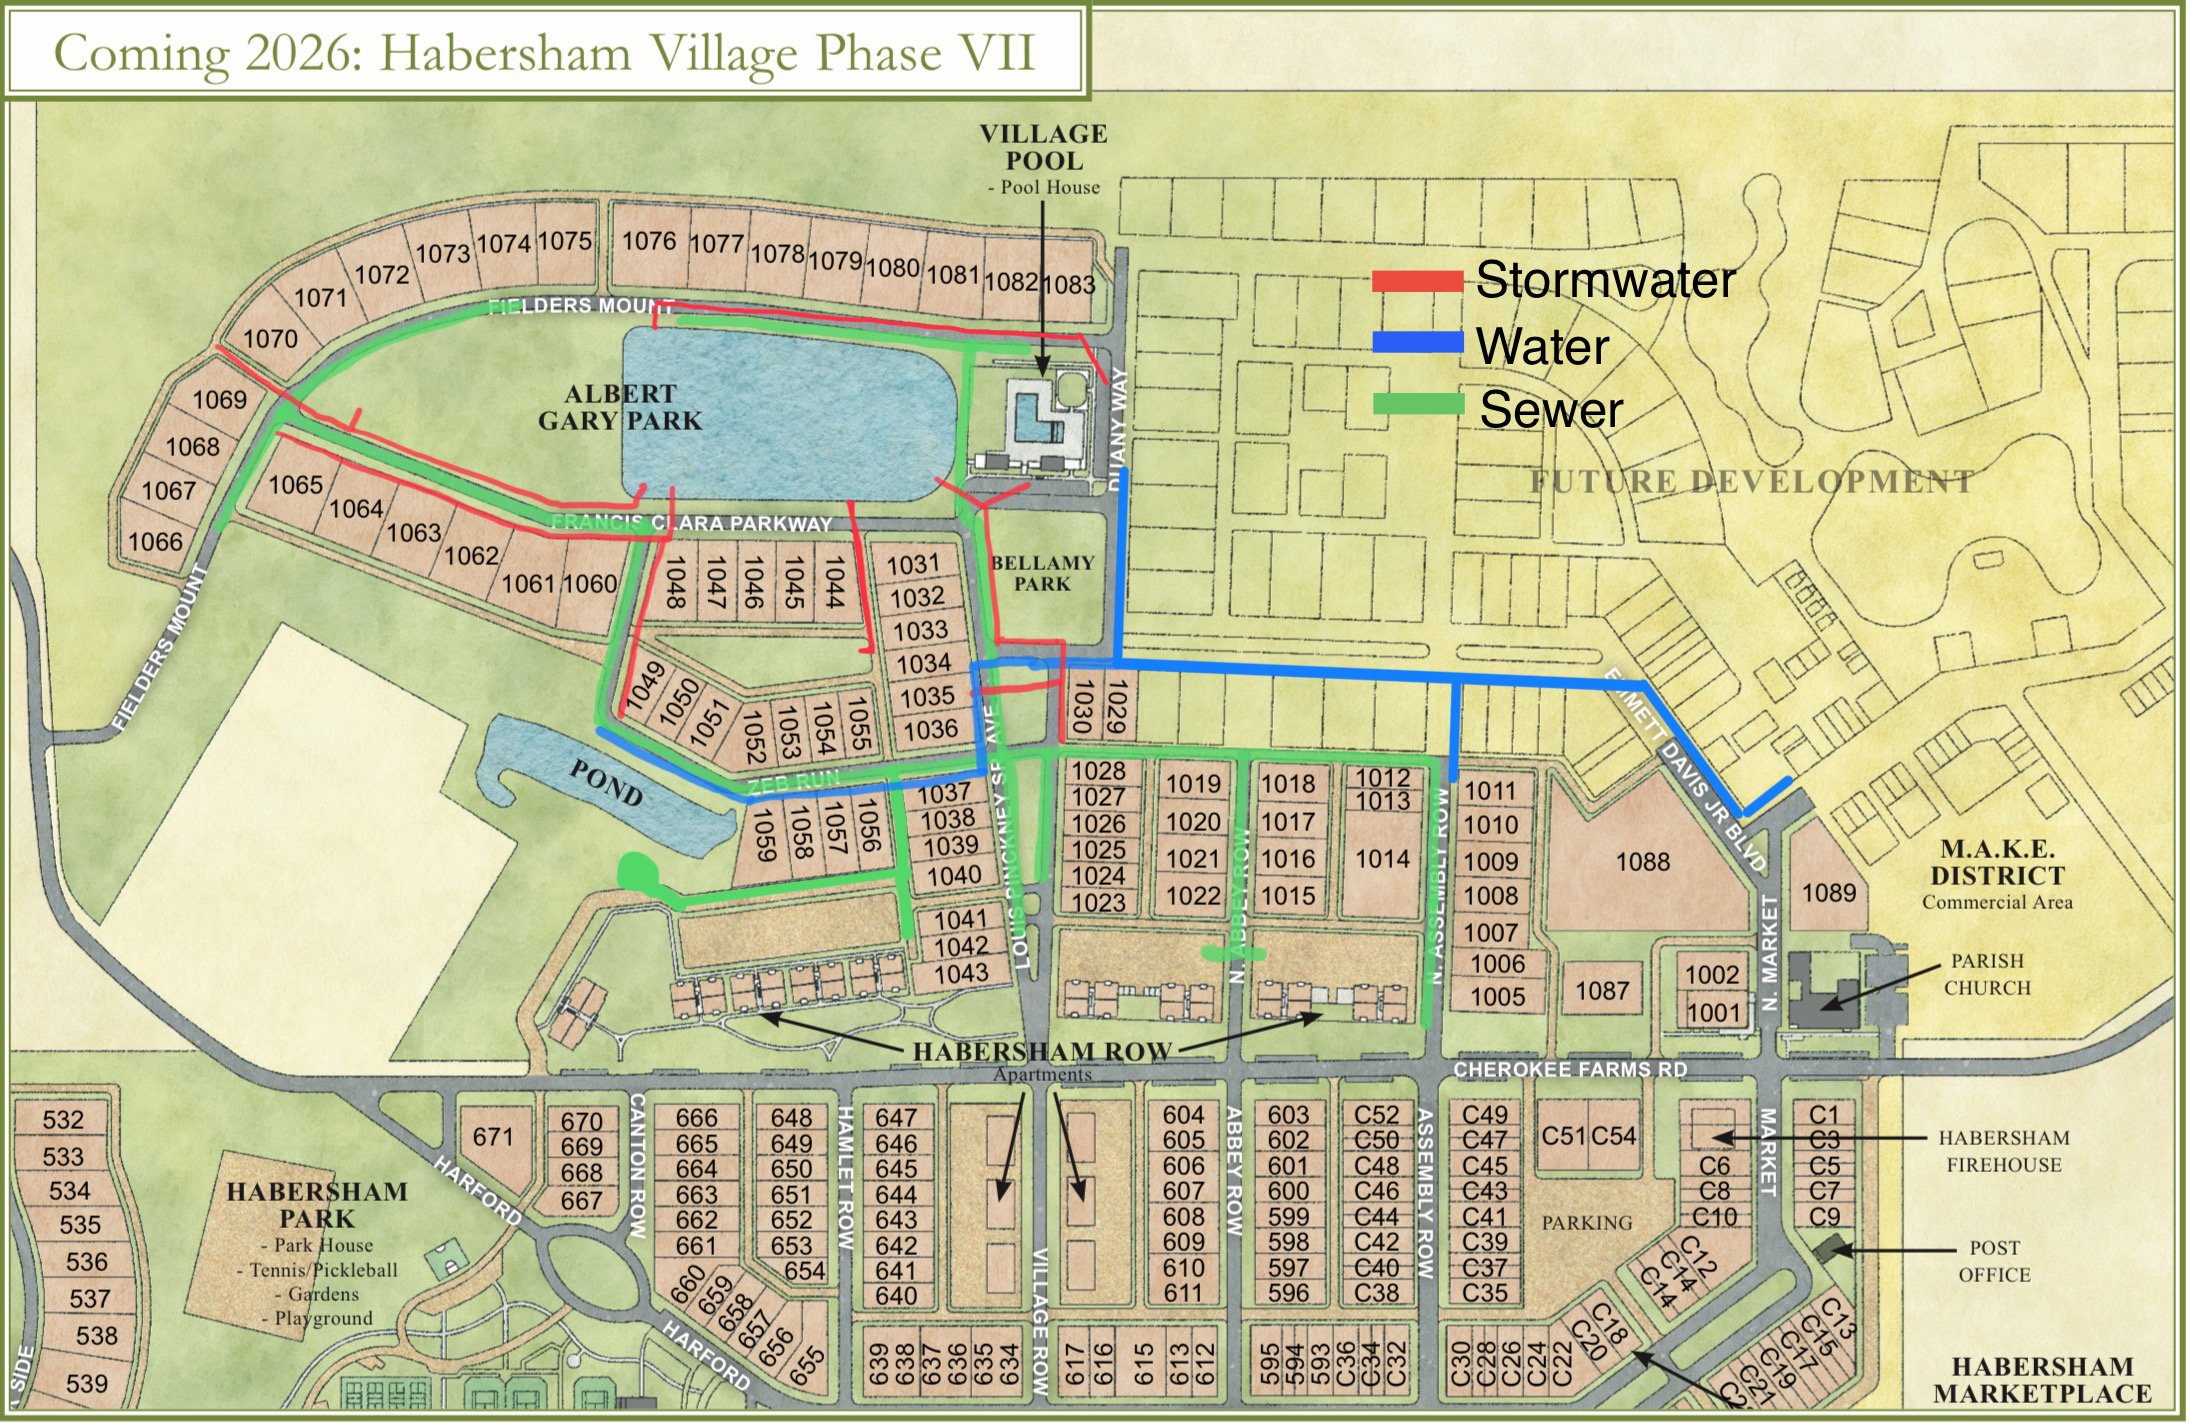
Map showing what has been put in the ground so far. Approximately 30%-40% complete.